





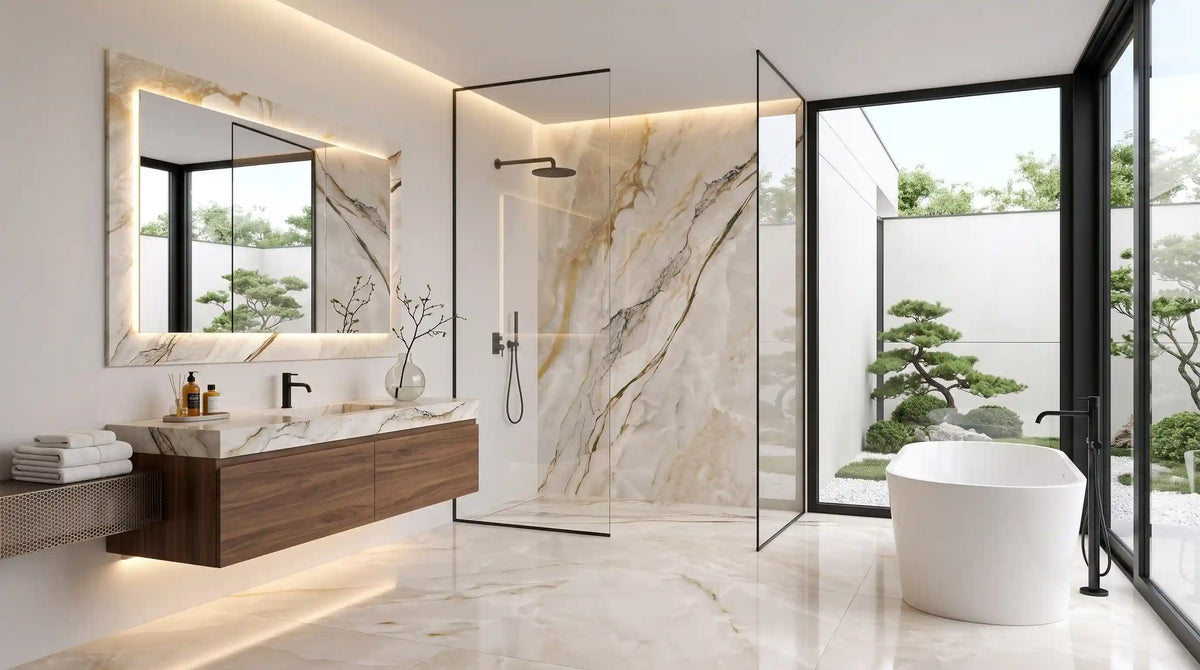
Choose quartz effect polished porcelain for walls, splashbacks and low-traffic dry floors. Keep it out of showers and wet rooms. The polished face reflects light beautifully, but it usually rates R9, so slip resistance is its one real limit. Check three things before you order: slip rating, tile thickness, and whether the factory applied a protective coating. One more point matters. Quartz effect porcelain is fired clay, not resin-bound quartz tile and not natural quartzite. Three materials, one confusing name.
That last point causes more wasted money than any other mistake in this category, so it is worth settling before anything else.
Quartz Effect, Quartz Tile or Quartzite? Settle the Material First
Search for quartz tiles and three unrelated products turn up on the same page. They look alike in photographs, yet they behave nothing alike once fitted, and telling them apart takes about two minutes while saving a great deal of grief.
What "Quartz Effect" Actually Describes on a Fired Porcelain Body
Quartz effect porcelain is a clay-based tile that carries a printed and glazed image of quartz or quartzite. The body is pressed from fine clays and sand, then fired at roughly 1,200°C until it turns dense and glass-hard. A high-definition print applies the crystal pattern, and a clear protective glaze then locks that pattern in place for the life of the tile.
The quartz look is on the surface. The strength comes from the fired body underneath.
That split matters at the till, because you get the shimmer and depth of a gemstone surface at porcelain prices, with none of the sealing that real stone demands.
Resin-Bound Quartz Tile Behaves Nothing Like Porcelain
Engineered quartz tile is a different animal altogether, made from crushed natural quartz, usually about 93 percent by weight, glued together with resin. Manufacturers sometimes add crushed mirror or glass for sparkle.
Resin is the weak point, because it softens under steady heat, yellows in strong sunlight, and reacts badly to the harsh cleaners most homes keep under the sink. Several buying guides that rank for "quartz tiles" describe this resin product rather than porcelain, which sends readers down the wrong path.
If a product sheet mentions resin content or a quartz percentage, you are not looking at porcelain.
Natural Quartzite: The Stone the Print Imitates
Quartzite is a true stone, formed when sandstone is crushed and heated deep underground. Quartzite is hard, striking and costly, and it also arrives porous, so it needs sealing when fitted and sealing again every few years to keep stains out.
Quartz effect porcelain copies the look of quartzite and skips the upkeep, which makes the swap an easy one for most homes.
Three Materials at a Glance
| Property | Quartz Effect Porcelain | Engineered Quartz Tile | Natural Quartzite |
|---|---|---|---|
| Composition | Fired clay body, printed and glazed surface | Crushed quartz in polymer resin | Solid metamorphic stone |
| Water absorption | Under 0.5% (ISO 10545-3) | Very low, resin-dependent | Porous, needs sealing |
| Heat tolerance | Excellent | Poor, resin softens | Excellent |
| UV stability outdoors | Excellent | Yellows over time | Excellent |
| Sealing required | No (glazed face) | No | Yes, on install and after |
| Pattern repeat | Fixed number of printed faces | Random within batch | Every slab unique |
| Typical cost | Lowest of the three | Mid | Highest |

Where This Tile Belongs, and Where It Must Not Go
Polished porcelain is a superb wall tile and a conditional floor tile. Getting that boundary right is the whole job.
Walls, Splashbacks and Feature Panels: Its Natural Home
Nobody walks on a wall. Every drawback of a polished surface disappears the moment the tile goes vertical.
On walls, the polished face does exactly what you bought it for. It bounces daylight deep into the room, doubles the apparent depth of veining, and makes a small bathroom read as considerably larger. Behind a hob or basin, the sealed glaze wipes clean in seconds because there is no texture for grease to sit in.
Large formats work hardest here, because a single 600x1200mm tile can cover a shower end wall with one or two joints instead of a dozen.
Dry Indoor Floors: Hallways, Living Rooms and Formal Dining
Polished floors belong where feet arrive dry. Living rooms, formal dining rooms, dressing rooms and interior hallways all qualify, provided there is a decent barrier mat at the front door.
The risk is not the tile. The risk is water arriving on it unexpectedly.
A hallway that opens directly onto a garden path in wet weather is a different proposition from a hallway behind a porch. Judge the room by how often the floor gets wet, not by what the room is called.
Bathroom Floors: The Conditional Yes
This is where honest advice matters, because a polished floor can genuinely work in a family bathroom, but only with clear conditions attached to it.
It suits a bathroom with a separate enclosed shower, good extraction and a bath mat in daily use. It does not suit a household with young children, elderly relatives, or anyone unsteady on their feet. Wet polished porcelain becomes genuinely slippery, and no cleaning product changes that.
Many designers solve it neatly, putting polished quartz effect on the walls while a matt porcelain floor tile with a proper slip rating goes underfoot in a matching tone. The scheme still reads as one material.
Shower Trays, Wet Rooms and Outdoors: The Hard No
Do not tile a shower floor, wet room floor or external surface in polished porcelain. This is not a preference. It is a safety line.
A shower floor is wet, soapy and walked on barefoot, while outdoors adds rain, frost and algae, and polished faces fail in every one of those conditions. Insurers take a dim view of polished flooring in rental and commercial property for exactly that reason.
Room-by-Room Permission Matrix
| Location | Polished quartz effect? | Reason |
|---|---|---|
| Bathroom and kitchen walls | Yes | No foot traffic, easy to wipe |
| Splashbacks behind hobs | Yes | Heat-stable glazed surface |
| Living room and dining floors | Yes | Dry underfoot in normal use |
| Internal hallways | Yes, with a barrier mat | Controls tracked-in water |
| Bathroom floors | Conditional | Only with a bath mat and no vulnerable users |
| Kitchen floors | Not advised | Spills and grease are constant |
| Shower floors and wet rooms | No | Standing water plus bare feet |
| Stairs and landings | No | Fall consequence is severe |
| Patios, balconies, porches | No | Rain, frost and algae |

Read the Slip Rating Before You Read the Price
Price differences across this category are small. Slip differences are not. Read the safety figure first and the cost second.
Why Polishing Drives the R Value Down
Slip resistance comes from surface texture, and polishing removes that texture deliberately, grinding the face smooth so that light reflects evenly across it. The shine you are paying for is the same property that reduces grip.
Under the DIN 51130 ramp test, most polished porcelain lands at R9, the lowest practical class. R9 means dry interior use. It does not mean bathroom floors, and it certainly does not mean wet areas.
R Rating, DCOF and PTV: Which Number Your Installer Will Ask For
Three systems describe the same thing, which is why specification sheets confuse people.
The R rating comes from a ramp test with oil, measured in degrees of tilt before a tester slips. DCOF measures wet grip with a sled, and 0.42 is the usual threshold for interior floors that get walked on wet. PTV comes from a swinging pendulum, and 36 or above signals low slip potential in UK commercial settings.
| Rating | Test method | Typical polished porcelain | What it permits |
|---|---|---|---|
| R9 (DIN 51130) | Oil-wet ramp, 6°–10° | Standard result | Dry interior floors, all walls |
| R10 | Oil-wet ramp, 10°–19° | Rare on polished faces | Domestic bathrooms and kitchens |
| DCOF (wet) | Sled test | Commonly below 0.42 | Below the interior wet threshold |
| PTV | Pendulum | Commonly under 25 | High slip potential when wet |
Most product listings for polished tiles publish none of these. Treat that silence as a warning rather than a detail, because a supplier who cannot produce a slip figure has not tested the tile for floor use.
If you want the full picture on how these ratings translate into real rooms, our guide to porcelain water absorption, slip ratings and thickness breaks down each test in plain terms.
Pair a Polished Wall With a Matt Floor
The strongest schemes use both finishes on purpose, with polished on the walls to deliver the light and the drama, and matt underfoot to deliver the grip.
Choose the two from the same colour family and the room still feels unified, and picking them from the same manufacturer range keeps the tone matched exactly under artificial light.
The Coating Nobody Warns You About
Here is the single most useful thing in this article, and almost no retailer mentions it.
Many polished porcelain tiles leave the factory with a thin wax or nano-coating on the face. Manufacturers apply it for two reasons: to protect the polished surface in transit, and to fill surface micro-pores so grout pigment cannot stain the tile during installation.
The coating does a job. Then it causes problems if nobody removes it.
Spot Factory Wax Under Raking Light
Finding it takes thirty seconds and a torch.
Hold a light low and shine it across the tile face at a shallow angle rather than straight on. Wax shows up as a faint cloudy haze that smudges when you rub it with a fingertip, while clean glaze stays sharp and reflective at every angle you view it from.
Do this test on a dry tile before any adhesive is mixed, and check two or three tiles from different boxes, because coating thickness varies across a single batch.
Why It Ruins Grout Joints on Vertical Installations
On walls the problem gets worse, because wax runs down the cut edges of the tile and coats the joint faces where the grout is supposed to bond.
Grout then refuses to key into the edge, so it either slumps out of the joint while still wet or cures with a weak bond that cracks and crumbles within months. Installers blame the grout. The grout is rarely at fault.
On floors the same coating shows up differently. After grouting and washing off, the surface dries hazy and dull rather than bright, and repeated washing does not lift it because the haze is trapped under the wax rather than sitting on top.
Strip It Before You Grout, Not After
Removal is straightforward when it happens in the right order.
Wash the fixed tiles with a mild abrasive surface cleaner made for polished porcelain, working in small sections and rinsing with clean water. Let the surface dry fully. Recheck under raking light. Only then mix the grout.
If you prefer belt and braces, apply a grout release or penetrating sealer once the wax has been stripped. That gives the face real protection during grouting, rather than a transit coating that was never meant to stay.
Ask your supplier one direct question before delivery: has this tile been treated with a wax or nano-coating? A good supplier will know the answer, and Tiles Paradise can supply material datasheets and test certificates on request, which settles the question before a single tile is cut.

Does Polished Porcelain Need Sealing?
The internet answers this badly. "Porcelain never needs sealing" is repeated everywhere, and for matt glazed porcelain it is true. For polished faces the picture is more nuanced.
How Polishing Opens Micro-Pores in a Fired Body
Firing closes the surface of a porcelain tile into a hard, glassy skin. Polishing then grinds part of that skin away to flatten it.
Under a microscope, the grinding opens microscopic pinholes that firing had sealed. The tile is still impervious as a body, with water absorption under 0.5 percent. The very top of the surface, though, now carries tiny openings that pigment can settle into.
That is why polished porcelain stains more readily than any other porcelain finish, despite being made from the same dense material.
When an Impregnating Sealer Earns Its Place
Sealing is not automatic. It is situational.
Apply an impregnating sealer before grouting if you are using a dark or strongly contrasting grout against a light tile. Charcoal grout against a crystal white quartz face is the classic risk, because grout pigment reaches those micro-pores during washing off and leaves a permanent grey cast.
Sealing is also worth it in kitchens, where turmeric, red wine, oil and coffee arrive regularly, though for a bathroom wall finished in soft grey grout you can skip it without regret.
One caveat governs everything, because if the factory has already applied a nano-coating, an extra sealer may simply sit on top and never penetrate the surface. Confirm the factory treatment first, then decide.
What a Sealer Will Not Fix
A sealer is not a grip coating, a scratch guard or a shine restorer. It fills pores. That is all.
It will not raise the slip rating, and any product claiming to make polished porcelain non-slip should be treated with caution. Anti-slip etching treatments do exist, but they work by microscopically roughening the surface, which dulls the polish you paid for.
Formats, Thickness and the 6mm Question
Format choice changes how the pattern reads, how many joints you see, and how the floor behaves underfoot.
600x1200mm and Larger: Seamless Walls, Fewer Joints
The 600x1200mm tile has become the default for premium walls, and for good reason. It covers ground fast, shows the printed veining at close to natural scale, and reduces grout lines to a minimum. Stock in this size also runs deep across the 600x1200mm large format wall and floor tile range, which makes matching a later top-up order far less of a gamble.
Push up to 1200x1200mm and the effect becomes architectural, with a feature wall or an open-plan floor reading almost as continuous stone rather than as separate tiles. Handling gets serious at that size, so budget for two fitters and suction lifters.
Rectified edges make these formats work. Because the tiles are cut to precise dimensions after firing, joints can drop to 1.5mm or 2mm, which is what creates the near-seamless look. The detail behind that precision is covered in our explainer on rectified porcelain tiles and edge tolerance.
600x600mm: The Balanced Floor Format
For floors, 600x600mm remains the most forgiving choice. It is light enough to handle alone, cheap enough to allow generous wastage, and small enough to follow minor variations in the substrate without fighting them.
It also cuts down waste in irregular rooms, which matters more than people expect on a hallway with three doorways.
Why 6mm Polished Slabs Are Wall Tiles in Disguise
Watch out for slim polished tiles sold in large formats. A 1200x600mm tile at 6mm thick is a wall product, whatever the listing says.
Thin tiles have less body to resist bending, and porcelain floor tiles are normally expected to reach a breaking strength of around 1,300 N at 7.5mm or thicker. A 6mm tile simply has less material working for it, and it demands near-perfect substrate flatness with full adhesive coverage, because any void beneath it becomes a crack under point load.
Some listings compound the confusion by naming the type as "wall" while the suitability field also lists floors and exterior walls. Read the thickness, not the marketing.
| Thickness | Typical use | Adhesive coverage needed | Notes |
|---|---|---|---|
| 6mm | Walls only | 100% solid bed | Bends easily, chips on cutting |
| 8mm–9mm | Walls and domestic floors | 95%+ on floors | The mainstream choice |
| 10mm–12mm | Heavy domestic and light commercial | 95%+ on floors | More forgiving over point loads |
| 20mm | External paving | Full bed or pedestal | Never polished |
Tiles Paradise supplies its polished quartz effect range in 600x1200mm at 8.5mm, rectified and suitable for underfloor heating, at factory-direct pricing that sits well below typical showroom rates for the same specification. The wider polished and gloss porcelain tile collection covers the same finish across several stone effects if you want to compare tones side by side.
Choosing a Colourway You Will Not Regret
Colour choice on a polished tile is not the same as colour choice on a matt one. Shine changes everything about how a shade behaves.
Crystal Whites and Cool Greys
White and pale grey quartz faces are the safest and the brightest. They throw light around a room, suit almost any fitting metal, and make compact bathrooms feel open.
Their weakness is contrast, because against a bright white face any grey shadow or smear reads clearly from across the room. Choose a grout within one shade of the tile and the surface stays calm.
Jade and Green Quartz Tones
Green quartz faces have become the strongest trend in this category, and they photograph beautifully. Deep jade tones carry gold or white veining that lifts under warm lighting and settles into moody depth under cooler light.
Use them as a feature rather than a whole room. A single jade wall behind a bath, framed by soft neutral surfaces, holds attention far better than four green walls.
Obsidian and Black Faces: The Fingerprint Tax
Black polished porcelain looks superb in a showroom and demands real commitment at home.
Dark gloss shows everything: dust, water spots, footprints and every fingerprint on a shower screen wall. That is a maintenance choice, not a defect. If you love it, put it where hands and feet rarely go, such as a feature wall, a splashback above the worktop line, or a downstairs cloakroom.
Shade Variation on Crystal-Shimmer Faces
Every printed tile range has a limited number of unique faces, and manufacturers publish a shade variation rating to describe how much the faces differ.
A V1 rating means near-uniform tiles, while V3 means moderate variation, which is common on quartz and marble effects because natural stone is never uniform. Crystal shimmer faces sit at the higher end, since the sparkle catches light differently across each tile.
That variation is the point, since it stops a large floor looking printed. It also means you must dry lay before fixing, which we come to shortly.
Grout Colour Pairing
| Tile tone | Recommended grout | Effect achieved |
|---|---|---|
| Crystal white with grey veining | Soft white or pale silver | Joints disappear, surface reads continuous |
| Warm cream with gold movement | Light beige or ivory | Keeps the warmth, avoids a cold line |
| Mid grey quartz | Mid grey, matched tone | Balanced, forgiving of dirt |
| Jade or deep green | Pale grey or soft sage | Frames the veining without competing |
| Obsidian black | Charcoal, not black | Charcoal hides dust better than true black |

Polished Large Format Shows Everything: Prepare the Substrate Accordingly
A matt tile forgives a wavy floor. A polished tile broadcasts it.
Flatness Tolerance and Why Lippage Is Visible on Gloss
Gloss surfaces produce a continuous specular highlight, a bright reflected line that runs across the whole floor. Where one tile sits a fraction proud of its neighbour, that reflected line breaks. Your eye catches the break instantly, even at a step height too small to feel underfoot.
Aim for a substrate flat to within 3mm over a 2m straightedge before any large-format polished tile goes down. On a floor that fails that check, a self-levelling compound is not an upgrade. It is part of the job.
Adhesive Class, Solid Bed and Back-Buttering
Use a polymer-modified flexible adhesive, class C2, and step up to a deformable S1 grade over heated screeds, timber substrates or any format above 600x600mm. For extra-large slabs at 1200x1200mm, an S2 highly deformable adhesive is the safer specification.
Notch size follows tile size, so a 10mm to 12mm notched trowel suits most large formats, combed in one direction, with adhesive also skimmed thinly onto the back of each tile.
That back-buttering step is not optional on big polished tiles. Aim for effectively full coverage on floors, and lift one tile early in the day to confirm you are achieving it.
Levelling Clips, Dry Laying and Batch Checking
Levelling clip systems are the difference between a good polished floor and a disappointing one, because they hold adjacent tiles flush while the adhesive sets, which is precisely the tolerance a gloss surface will expose.
Before fixing anything, open at least three or four boxes and dry lay a section across the room. Shuffle the tiles so similar faces are not sitting side by side, and check that every box carries the same batch and shade code. Mixing two batches mid-floor produces a visible tonal band that cannot be corrected afterwards.
Order the full quantity in one go for the same reason, because batches change quickly and a top-up order placed six weeks later rarely matches the original.
Cut and Drill a Polished Face Without Chipping the Edge
Polished porcelain is dense and brittle at the surface, so cutting technique matters.
Score-and-snap cutters work on straight runs if the wheel is sharp and fresh. For anything else, use a wet saw with a continuous-rim diamond blade and cut face up at a steady feed rate. Rushing the cut is what causes edge chipping.
For holes, use a diamond core bit with water cooling and start at a shallow angle before bringing the bit upright. Percussion drilling will crack the tile.

Underfloor Heating Under a Polished Floor
Porcelain is a natural partner for underfloor heating, because it is dense enough to carry warmth well and stable enough to hold its shape through the daily heating cycle without fuss.
Commission the Screed Before the First Tile Goes Down
A new screed holds water long after the surface feels dry, so tiling over it too soon traps that water underneath, where it weakens the adhesive and pushes white salt marks up through the grout.
Let the screed dry out fully, then run the heating in before you tile. Raise the temperature slowly over several days, hold it at its working level, then wind it back down and switch off. Let the floor cool to room temperature before the first tile goes down. Once the adhesive and grout have set, bring the heat back up by a few degrees a day rather than all at once.
Movement Joints in Continuous Polished Floors
A heated floor grows and shrinks a little every day, so a long run of dense porcelain has to be left free to move along with it.
Leave a gap of at least 6mm around the whole edge of the floor, tucked out of sight behind skirting or a trim. In big open-plan rooms, add a movement joint every 5 to 8 metres, and always at doorways or where the floor below changes. Skip these and the tiles lift into a ridge, which is the classic failure on a heated floor.
Living With Gloss: The Daily Reality
Nobody warns buyers about this part, and it is the thing they notice on day one.
Footprints, Smears and the Lighting Angle Problem
A polished floor shows footprints. It always will.
The reason is optical rather than hygienic. A smooth reflective surface returns light in a single direction, so the thin film left by a bare foot or a damp mop scatters that reflection and appears as a visible mark. The floor is clean. It simply reveals what a matt floor conceals.
Lighting design either solves this problem or magnifies it, because downlights aimed straight at a polished floor create bright pools that expose every mark on the surface. The same room with wall-washing light, uplighting or diffused ceiling fittings looks flawless for days. If you are specifying polished floors, brief your electrician before the ceiling is boarded.
A Cleaning Routine That Keeps Shine Without Film Build-Up
Simple beats strong with polished porcelain.
Sweep or vacuum first, because grit dragged under a mop is what causes fine scratching. Then mop with warm water and a pH-neutral tile cleaner, using far less product than the bottle suggests, and change the water as soon as it starts to look cloudy.
Skip soap-based floor cleaners, wax polishes and "shine restorer" products entirely, because those leave a film that dulls the surface, attracts dust, and gets harder to remove with every application. Dry the floor with a clean microfibre cloth after mopping and the shine looks showroom-fresh.
In hard water areas, limescale spotting on shower walls responds to a dilute acidic tile cleaner used occasionally. Never use it on the grout joints more than you must.
Lifting Grout Haze From a Polished Face
Grout haze is a thin film of cement left behind after washing off. On matt tiles it hides. On polished tiles it kills the reflection.
Catch it early, because a haze cleaned within the first 24 to 48 hours usually lifts with nothing more than warm water and a white nylon pad. After the grout has fully cured, you will need a proprietary cement residue remover matched to your grout type, since cement, epoxy and ready-mixed grouts each need different chemistry.
Two rules keep you out of trouble: never use a metal scourer, and always test any acidic remover on a spare tile first.
If the haze refuses to shift with the correct product, suspect factory wax rather than grout. That returns you to the raking light test described earlier.
Scratches: What Causes Them, What Hides Them
Porcelain is harder than most things that meet it, so deep scratches are rare. Fine surface scuffing is not.
The culprits are almost always grit underfoot, unprotected furniture feet and dragged appliances. Fit felt pads to every chair and table leg, place a barrier mat at each external door, and lift rather than slide anything heavy.
Pattern helps too. A quartz effect with visible crystal movement disguises light scuffing far better than a plain gloss face, which is one more reason this category suits real homes better than flat-colour polished tiles.
Quartz Effect Polished Porcelain Against the Alternatives
Three comparisons come up again and again at the point of choosing.
Against Polished Marble Effect Porcelain
Both tiles are polished porcelain, so they behave in exactly the same way once fitted, and the only real difference between them is how they look.
Marble effect looks classic, with soft veining that drifts across the face and keeps the mood of the room formal. Quartz effect looks modern instead, with crystal sparkle, banded movement and richer colour. Pick marble effect for a period scheme, and quartz effect when you want the wall itself to be the star.
Against Real Quartzite Slabs
Natural quartzite wins on being the real thing. It loses on nearly everything else.
Quartzite costs several times more per square metre and arrives in heavy slabs that need trained fitters. It must be sealed on the day it goes down and then sealed again every two to four years, and missing one of those rounds is what leaves a permanent stain. Porcelain costs less, never needs sealing, shrugs off the acids that would etch stone, and looks the same from one end of a big floor to the other.
Against Matt Quartz Effect Porcelain
This is the comparison that decides most bathrooms.
| Factor | Polished quartz effect | Matt quartz effect |
|---|---|---|
| Light reflection | High, brightens dark rooms | Low, softer and calmer |
| Typical slip rating | R9 | R10 or better |
| Suitable for bathroom floors | Conditional | Yes |
| Suitable for wet rooms | No | Often yes, check the rating |
| Shows footprints | Noticeably | Barely |
| Depth of veining | Amplified | Muted |
| Cleaning effort | Higher, needs drying off | Lower |
| Best placement | Walls, feature panels, dry floors | Floors throughout |
Most homes are best served by using both finishes together, with polished on the walls where it does its best work, and matt underfoot where grip and easy cleaning matter more than shine.
Costing the Job Properly
Tile price is only about half of what you will really spend on the job, so planning carefully for the other half is what keeps a budget intact.
Tiles Per Square Metre by Format
| Format | Tiles per m² | Typical thickness | Approximate weight per m² |
|---|---|---|---|
| 300x600mm | 5.56 | 7–8mm | 16–18kg |
| 600x600mm | 2.78 | 8–9mm | 19–21kg |
| 600x1200mm | 1.39 | 8.5–9mm | 19–21kg |
| 1200x1200mm | 0.69 | 10–11mm | 23–26kg |
Weight follows thickness rather than tile size, so two formats of the same thickness weigh the same per square metre. Weight matters most on walls, so check that the wall can carry the load before you fix large tiles above waist height, especially onto plasterboard or timber studs.
Wastage Allowance by Layout
Add wastage on top of the measured area, not inside it.
A straight stack or grid layout in a simple rectangular room needs about 10 percent. Rooms with several doorways, alcoves or angled walls need 12 to 15 percent. Diagonal and herringbone layouts generate the most offcuts and need 15 to 20 percent.
Always round up to full boxes. A handful of spare tiles stored flat in the garage is cheap insurance against a future cracked tile that no longer exists in any batch.
The Line Items People Forget
Budget for the right grade of adhesive, plus grout, levelling clips and edge trims, then add a self-levelling compound if the floor needs one and a decoupling mat over timber or a heated screed. Allow for sealer if your grout is a contrasting colour, and for a skip to take the old floor away.
Buying the materials as one package is usually cheaper than picking them up piece by piece. Full-pallet and trade pricing cuts the cost per square metre sharply on bigger jobs, so ask about it before you order room by room.
One last piece of advice beats every specification sheet: order a physical sample and live with it in the room for a few days before you commit. No photograph can show how a crystal shimmer face behaves under your own lights at eight in the morning and again at eight at night. Seeing the real tile against your own paint and fittings is what stops the costliest mistake in tiling.
Questions Buyers Ask Before Ordering Quartz Effect Polished Porcelain
Is polished porcelain too slippery for a bathroom floor?
It is borderline. Most polished faces rate R9, which sits below the level normally recommended for floors that get wet. It can work in an adult household with a separate shower enclosure and a bath mat in daily use. Choose a matt or textured floor tile if anyone in the home is unsteady, elderly or very young.
Does polished porcelain need sealing?
The body does not, because porcelain absorbs under 0.5 percent water. The polished surface carries micro-pores opened during polishing, so an impregnating sealer is worthwhile before grouting with dark or contrasting grout, and in kitchens where staining agents are common. Check first whether the factory has already applied a coating.
Why does my new polished floor show every footprint?
Because a smooth surface reflects light in one direction, and any thin film disturbs that reflection. The floor is clean. Softer, indirect lighting and drying the floor with a microfibre cloth after mopping will make the marks effectively invisible.
My tiles look hazy after grouting. What went wrong?
Either grout residue was left too long before washing off, or the tiles carry a factory wax coating that was never removed. Try a cement residue remover matched to your grout type. If the haze persists, it is wax, and it needs an abrasive surface cleaner made for polished porcelain.
Can I use 6mm polished tiles on a floor?
Treat 6mm as a wall product. Slim tiles have less body to resist bending and demand a perfectly flat substrate with full adhesive coverage. For floors, specify 8mm or thicker.
Will polished porcelain scratch?
Not easily, but fine scuffing happens. Grit underfoot is the main cause, so use barrier mats and felt pads on furniture. A patterned quartz face hides light scuffing far better than a plain gloss tile.
Is quartz effect porcelain the same as a quartz worktop?
No. A quartz worktop is crushed stone bound in resin. Quartz effect porcelain is fired clay with a printed and glazed surface. Porcelain handles heat far better; resin-bound quartz can scorch and discolour.
Can I put polished porcelain on a heated floor?
Yes, and it performs well. Commission the screed fully before tiling, use a deformable adhesive, and include perimeter and intermediate movement joints. Raise the temperature gradually after the grout has cured.
How much variation should I expect between tiles?
Quartz and crystal effects usually carry a moderate shade variation rating, which is what keeps a large floor from looking printed. Dry lay several boxes together before fixing so similar faces are not grouped side by side.
Which format suits a small bathroom?
A 600x1200mm tile on the walls, laid to minimise cuts, makes a small bathroom feel considerably larger because there are so few joints to break up the surface. Keep the floor in a matching matt tone for grip.