


Knowing how to tile a bathroom is one of the most rewarding DIY skills a homeowner can learn. Whether tackling a full renovation or refreshing tired walls and floors, tiling transforms a bathroom completely and with the right preparation, it is far more achievable than most people expect.
Tiling a bathroom does require patience, the correct materials, and a logical sequence of steps. Follow this guide from surface preparation through to grouting and finishing, and the result will be a clean, durable, professional-looking bathroom that lasts for years.
What Tools and Materials Does a Bathroom Tiler Need?
Getting the tool list right before starting saves significant time and frustration. Below are the essentials for both wall and floor tiling projects.
Tools:
-
Spirit level and long straight edge
-
Tile cutter (manual score-and-snap or electric wet saw)
-
Notched trowel (3mm for walls, 6mm for floors)
-
Rubber grout float
-
Tile spacers (typically 2mm–5mm)
-
Tape measure and pencil
-
Bucket, mixing paddle, and sponge
-
Tile adhesive and grout
Materials checklist:
|
Material |
Purpose |
|
Tile adhesive (flexible) |
Bond tiles to the substrate |
|
Waterproof primer / PVA |
Seal and stabilise substrate |
|
Backer board (e.g. Jackoboard) |
Wet area substrate |
|
Grout |
Fill joints between tiles |
|
Silicone sealant |
Movement joints at corners and changes of plane |
|
Tile trim/edging strips |
Protect and finish exposed tile edges |
Always add 10–15% extra to any tile order to account for cuts and future breakages.
How Do You Prepare a Bathroom Wall for Tiling?
Surface preparation is the single biggest factor in a successful tile job, yet it is the step most often rushed. Tiles bonded to a poor substrate will crack, hollow, or eventually fall.
Remove all existing tiles, adhesive residue, and loose plaster. In wet zones such as shower enclosures, fit a waterproof tile backer board rather than tiling directly onto standard plasterboard, which degrades with prolonged moisture exposure. Prime all surfaces with a suitable adhesion primer and allow it to dry fully before applying any adhesive.
Which Bathroom Tiles Work Best for Walls and Floors?
The tile material determines both longevity and maintenance requirements. Bathroom porcelain tiles are the hardest-wearing option - dense, low-absorption, and frost-resistant — making them ideal for floors and shower walls alike. Bathroom ceramic tiles are a lighter, more affordable choice suited to walls where heavy foot traffic is not a concern.
For floors specifically, always choose a tile with a suitable slip-resistance rating. Bathroom anti-slip tiles carry an R-rating; R10 is the standard minimum for domestic wet floors.
Tile size also has a significant visual impact. Small bathroom tiles (30x60cm) suit compact or awkwardly shaped rooms, while medium 60x60cm tiles give a contemporary, airy feel. Large format 60x120cm tiles reduce grout lines and create the most seamless finish, though they require a perfectly flat substrate.

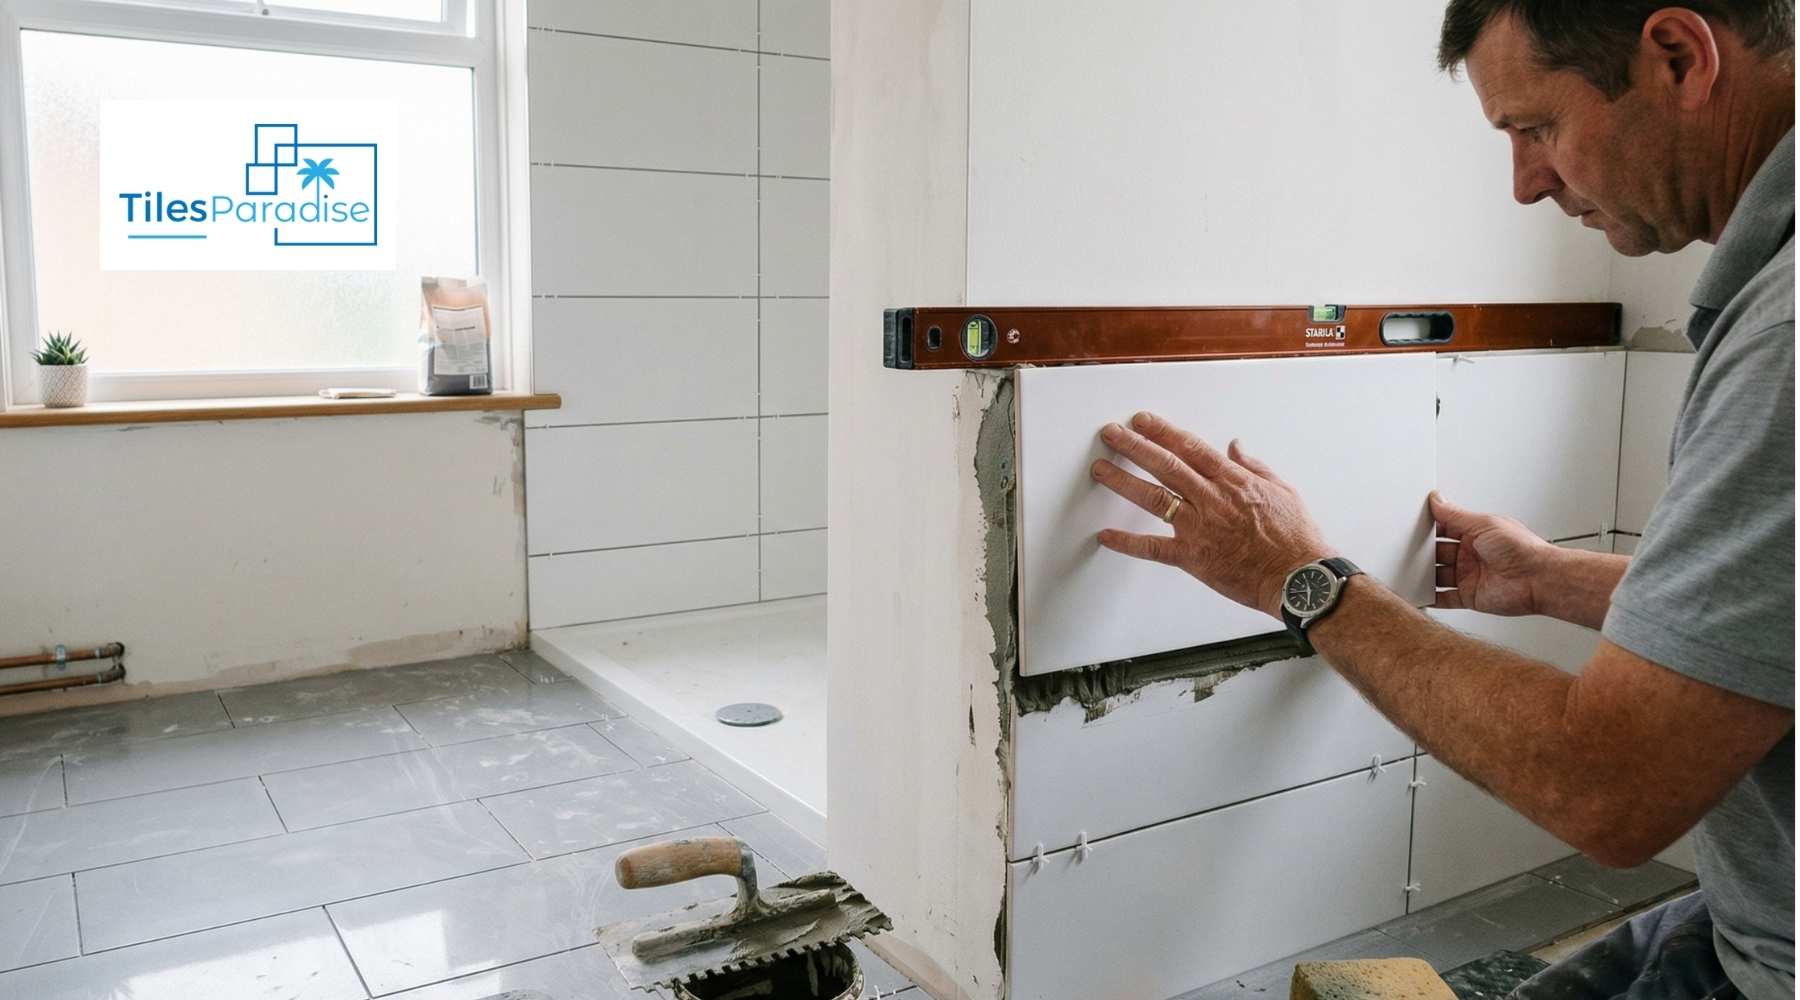
How Do You Tile a Bathroom Wall Step by Step?
Tiling a bathroom wall correctly depends on finding a true starting point before applying a single tile. Follow this sequence for reliable results.
-
Find the lowest point of the wall using a spirit level. Mark a horizontal datum line one tile height above the floor level — this is the working baseline.
-
Find the vertical centre of the wall and mark a plumb vertical line. Dry-lay a row of tiles along the datum line to check the cut sizes at each end; adjust the centre line if one side would result in a sliver less than half a tile.
-
Mix tile adhesive to a smooth, lump-free consistency. Using a notched trowel, spread adhesive onto the wall in sections of no more than 1m² at a time (known as back buttering on larger tiles).
-
Press each tile firmly with a slight twisting motion. Insert tile spacers at every corner. Use a spirit level and straight edge every few tiles to check alignment.
-
Cut-edge tiles with a tile cutter. Score the glaze cleanly in a single stroke; for curves around pipes, use tile nippers or an angle grinder with a diamond blade.
-
Leave adhesive to cure — typically 24 hours before grouting. Do not walk on the wall adhesive or apply weight.
Bathroom wall tiles in a staggered brick bond pattern, such as classic subway tiles in a bathroom, require a 50% offset between rows. Maintain this consistently using a marked batten.
How Do You Lay Tile on a Bathroom Floor?
Floor tiling follows the same principles as wall tiling but demands closer attention to levelness, since the floor bears direct load. Start by checking the existing floor for high spots and hollows; use a self-levelling compound where the deviation exceeds 3mm over 2 metres.
Mark a central cross on the floor - the intersection of the room's centre lines. Dry-lay tiles from the centre outward toward each wall, adjusting the cross point so any cut tiles at the perimeter are equal and larger than half a tile. Spread floor tile adhesive with a larger notched trowel, pressing and twisting each tile firmly. Check the level across every four or five tiles using a long spirit level.
Bathroom floor tiles with a matt or textured finish provide better grip underfoot than high-gloss options, a practical consideration in a room that accumulates water.

How to Tile a Small Bathroom Shower Area
A shower enclosure combines wall tiling, floor tiling, and waterproofing into a single critical zone. Before any tiles go on, apply a tanking membrane or waterproofing slurry to all surfaces inside the enclosure, paying particular attention to internal corners, the threshold, and around any pipe penetrations.
Work from the bottom of the shower tray upwards, tiling the back wall first and the side walls last. Use a fully flexible adhesive rated for wet and submerged conditions, and leave movement joints (filled with silicone, not grout) at all internal corners and where tiles meet the tray or bath rim. When tiling a bathroom shower floor, a non-slip tile with a minimum R11 rating is recommended for safety.
How Long Does It Take to Tile a Bathroom?
The time required to tile a bathroom depends on room size, tile format, and the complexity of the layout. As a general guide for a UK-standard family bathroom:
|
Task |
Estimated Time |
|
Surface preparation |
4–8 hours |
|
Wall tiling (approx. 10m²) |
6–10 hours |
|
Floor tiling (approx. 4m²) |
3–5 hours |
|
Adhesive curing (before grouting) |
24 hours |
|
Grouting and siliconing |
3–5 hours |
|
Silicone curing (before use) |
24 hours |
Total: typically 2–4 days from start to finish, spread across multiple days to allow cure times. Vinyl tiling a bathroom floor is significantly faster, as it requires no adhesive cure time. Though it does not offer the same durability as ceramic or porcelain.
How to Grout and Seal Bathroom Tiles Properly
Grouting is the finishing stage that locks tiles in position and protects the substrate from moisture ingress. Choose a grout with a joint width that matches the spacers used. Flexible, waterproof grout is recommended for all bathroom applications.
Apply grout diagonally across the tile faces using a rubber float, working it firmly into the joints. Remove excess from the tile surface with a damp sponge before it hardens, rinsing the sponge frequently. Once dry (usually 24 hours), apply a grout sealer to light-coloured or natural-finish grouts to prevent staining. At all corners, between the tiles and the bath or floor, use a colour-matched silicone sealant rather than grout; silicone accommodates the natural movement of a building that rigid grout cannot.

Can You Paint Tiles in a Bathroom?
Painting over existing tiles is an option when a full retiling is not viable, but it comes with important limitations. Specialist tile paint is available and can adhere to glazed ceramic surfaces when properly prepared. The tiles must be degreased thoroughly, lightly sanded, and primed before any topcoat is applied.
In wet zones such as showers and splash areas, tile paint is not a long-term solution; moisture and heat cycling will eventually cause peeling. Painting works better on walls away from direct water contact, such as a tiled splashback behind a basin.
If the goal is to cover dated or damaged tiles rather than replace them, tiling over existing tiles is an alternative, provided the substrate can handle the additional weight and the combined tile height does not conflict with door frames or fittings.
How to Cover or Update Tiles Without Full Removal
Removing old tiles is messy, time-consuming, and generates significant waste. Two practical alternatives are retiling over existing tiles and using tile-effect wall panels. Tiling over existing tiles is acceptable when the existing tiles are firmly bonded (tap each tile; a hollow sound indicates debonding), the wall can support the additional load, and the total tile depth does not cause fitting issues.
Tile-effect panels - available in PVC and composite materials can be fixed directly over existing tiles without adhesive or grouting, making them a popular choice for rental properties or quick bathroom refreshes.
Marble-effect and onyx-effect bathroom tiles in porcelain offer the look of natural stone with none of the maintenance demands - no sealing, no staining risk. Marble-effect bathroom tiles and terrazzo bathroom tiles are particularly popular for feature walls and create a high-end finish at a fraction of natural stone pricing.
How Much to Tile a Bathroom
The cost to re-tile a bathroom in the UK varies considerably based on tile choice, room size, and whether professional labour is involved. Material costs alone for a standard family bathroom typically range from £300 to £900, while professional tiling labour adds a further £400–£900 depending on complexity and location.
For a detailed breakdown of pricing by tile type, room size, and finish, including how much tiling a bathroom should cost when hiring a professional, visit the full guide on bathroom tiling costs.
Bathroom Wall and Floor Tile Ideas
Choosing the right tile combination is just as important as the installation itself. From classic subway tiles in a bathroom to bold statement floors using large-format bathroom tiles, the range of options available today makes it possible to achieve almost any aesthetic at any budget.
For a curated selection of current trends, including ideas for tiling a small bathroom, luxury wet rooms, and mixed material looks, explore bathroom wall and floor tile ideas for inspiration before committing to a tile style.
Final Thoughts
Tiling a bathroom is a project well within the reach of a determined homeowner, provided the right preparation, materials, and sequence are followed. Starting with a solid, primed substrate, choosing the correct tile for each surface, and allowing adequate cure times between stages are the three fundamentals that separate a long-lasting result from one that causes problems within a year or two.
Whether opting for classic bathroom ceramic tiles, premium porcelain, or a decorative finish like terrazzo or onyx effect, the tile choice sets the tone for the entire room. Take the time to plan the layout, account for cuts, and never skip the silicone at movement joints, and a bathroom tiling project will deliver a result that looks professional and stands up to daily use for many years to come.
FAQ’s
-
What is the correct way to tile a bathroom?
Setting out bathroom tiles involves finding the center point of walls and floors to ensure a symmetrical, balanced layout with minimal cuts.
-
What are common bathroom tiling mistakes to avoid?
Uneven subfloors, out-of-plumb walls, or skipping backer boards can all lead to lippage, cracking, or even full-on tile failure.
-
In what order should you tile a bathroom?
Wall and floor tiles should go in first, before installing your fixtures and fittings. This allows for a more professional finish and means avoiding awkward tile cuts to fit around fixtures.
-
What is the golden rule for bathroom layouts?
Design around flow and function before adding style. Every fitting, fixture, and detail should support movement, comfort, and easy use without wasting space. A good layout turns even a small bathroom into a smart, inviting space.
-
How much should I pay a tiler per day?
In the UK, tilers typically charge a day rate, which generally falls between £200 and £350. For example, Checkatrade notes that this is a common range, while MyBuilder reports an average daily rate of £300.