





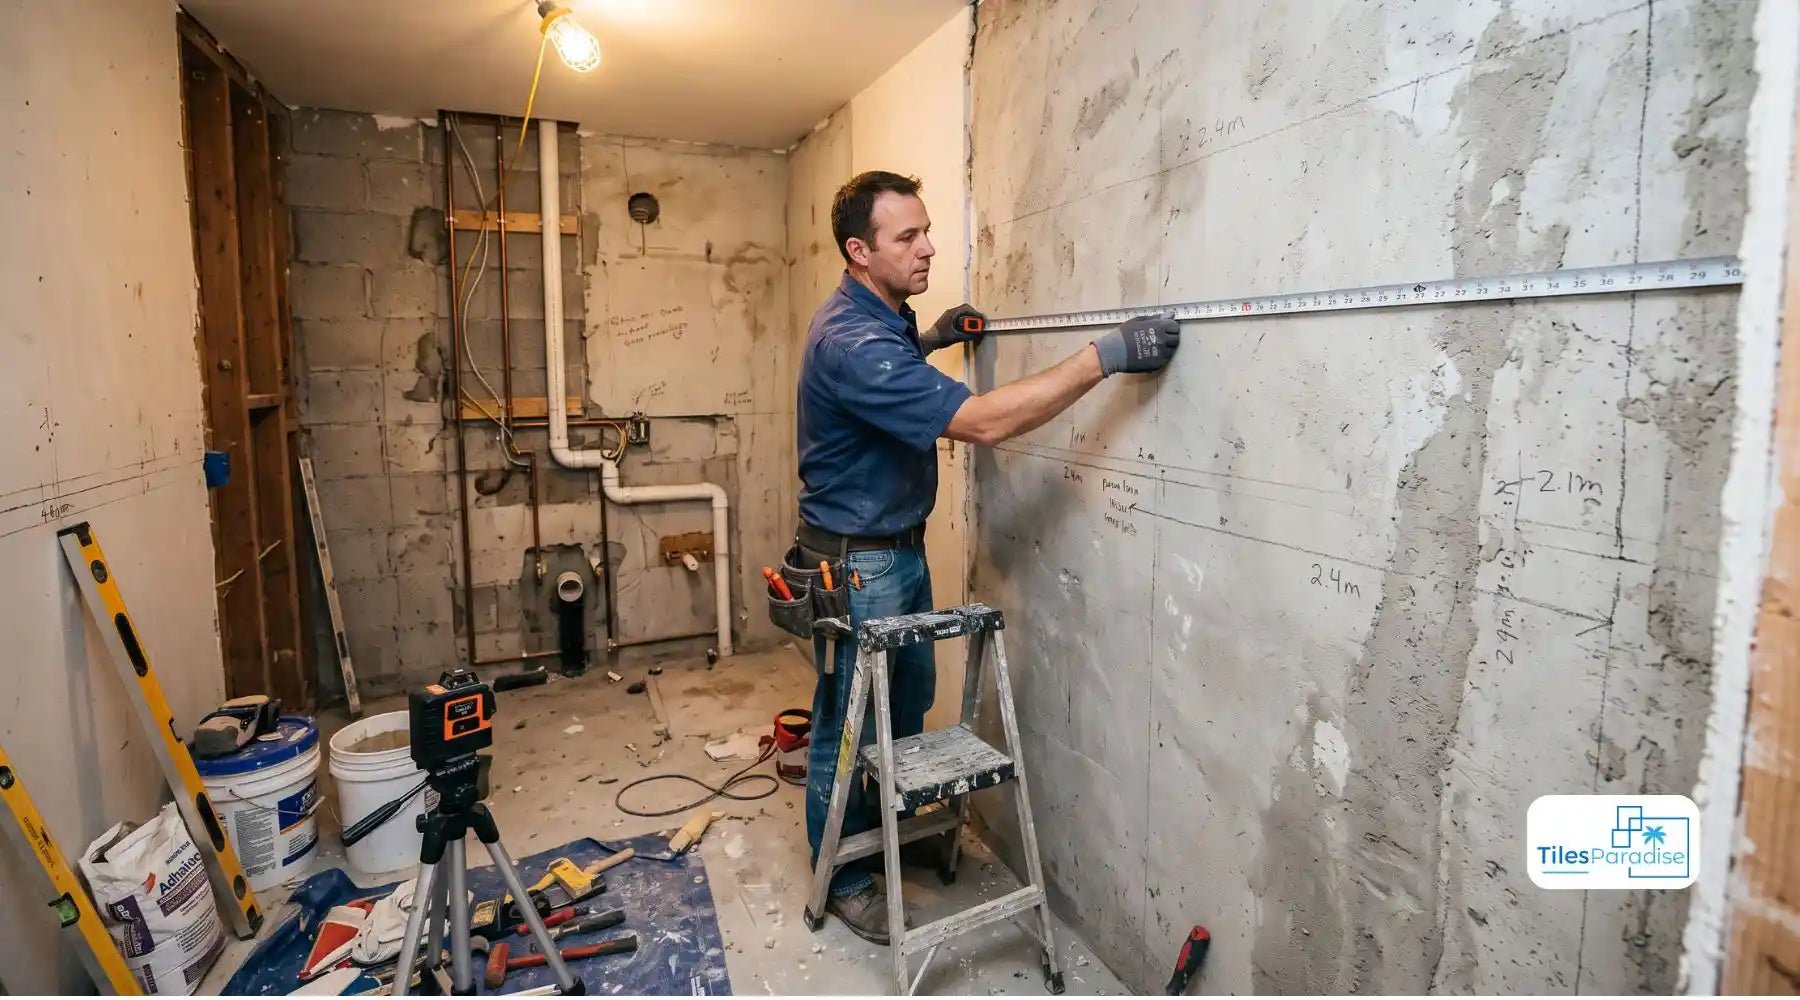
Bathroom tile quantities are calculated per surface, not per room. Floor area, wall area, and the shower zone each use a different measurement method, and the total is only correct once layout wastage has been applied and the result rounded up to whole boxes.
The tile calculator below handles the arithmetic. This guide gives you the numbers to put into it, how to measure a bathroom wall, what to deduct, what to add, and how much adhesive and grout the finished area will need.

The calculator works on a single area at a time. For a full bathroom, run it twice: once for the floor, once for the walls. The sections below show how to arrive at each figure.
How Do You Measure a Bathroom Floor for Tiles?
Multiply floor length by width, in metres, measured wall face to wall face.
For an L-shaped bathroom, split the floor into two rectangles, calculate each, and add the results.
Do not deduct the footprint of a bath, a shower tray, or a pedestal basin unless the fitting is already installed and will not move. Tiling under a future bath position costs a few tiles. Discovering a bare patch after the old bath comes out costs the whole floor.
Do you tile under a wall-hung vanity or toilet? Yes. Tile the full floor. Wall-hung units are specified precisely so the floor runs beneath them, and a floor-standing replacement later will not cover the same footprint. For a floor-standing vanity, tile to 50mm past the unit's footprint.
How Do You Measure Bathroom Walls for Tiles?
Multiply the room perimeter by the tiled height, then deduct openings over 1 m².
Wall area = Perimeter (m) × Tiled height (m)
Perimeter = (Length + Width) × 2
Measure walls individually wherever the room is irregular, or where a boxed-in soil pipe, bulkhead or chimney breast interrupts the run, then add the individual results.
Worked Example: A 2.4m × 1.7m Bathroom
|
Step |
Calculation |
Result |
|
Perimeter |
(2.4 + 1.7) × 2 |
8.2 m |
|
Gross wall area, full height |
8.2 × 2.4 |
19.68 m² |
|
Deduct door (762 × 1981mm) |
19.68 − 1.51 |
18.17 m² |
|
Window 0.6 × 0.9m — under 1 m², left in |
— |
18.17 m² |
|
Add window reveals, 100mm deep |
+ 0.30 |
18.47 m² |
18.47 m² is the figure to enter into the calculator. The floor, calculated separately, is 2.4 × 1.7 = 4.08 m².
How Do You Calculate Half-Tiled Walls?
Multiply the perimeter by the tiled height only, then add the shower zone separately at full height.
Half-height tiling is the most common UK bathroom specification and the most commonly miscalculated. Typical tiled heights run 1.0m to 1.2m.
For the same room at 1.1m half-height:
-
Perimeter 8.2m × 1.1m = 9.02 m²
-
Shower wall at full height: 0.9m wide × 2.4m = 2.16 m², less the 1.1m already counted = 1.4 m² extra
-
Net before deductions = 10.42 m²
Set the tiled height to a whole number of tile courses. A 30×60cm tile laid horizontally gives courses at 0.3m, 0.6m, 0.9m and 1.2m. Choose 1.2m and the top edge lands clean with no horizontal cut across the entire room.
Which Openings Do You Deduct?
Deduct any single opening larger than 1 m². Leave anything smaller in the calculation.
A standard internal door at 762 × 1981mm is 1.51 m² and is deducted. A 600 × 900mm window is 0.54 m² and is not, the cuts around a small opening waste more material than the deduction saves. Leaving it in is the safer error.
Do Window Reveals Add Tiles or Remove Them?
Reveals add tiled area. They are the most frequently missed measurement in a bathroom tile order.
A window opening removes area from the flat wall but creates four new tiled surfaces: two side reveals, the head, and the sill. Picture the opening as a cardboard box lid folded inward; unfolding it recovers most of the area you just deducted.
For a 600 × 900mm window with 100mm reveals:
|
Surface |
Calculation |
Area |
|
Side reveals (×2) |
2 × (0.9 × 0.1) |
0.18 m² |
|
Head |
0.6 × 0.1 |
0.06 m² |
|
Sill |
0.6 × 0.1 |
0.06 m² |
|
Total |
0.30 m² |
Reveals also need mitred or trimmed edges, which raises the cut rate. Add 5% to your wastage figure for any bathroom with a tiled window reveal.
Do You Tile Behind the Bath?
Yes, tile the wall to floor level behind a removable bath panel. Panels come off for access, and a future bath swap to a different size leaves an untiled strip. Cost: roughly 0.5 to 0.8 m².
Behind a concealed cistern frame, tile the duct face only. Do not tile the wall inside the duct.
How Much Wastage Should a Bathroom Tile Order Include?
Wastage runs from 10% for a straight lay to 20% for chevron. The figure is set by how many perimeter cuts the layout generates, not by the size of the room.
The calculator applies the standard 10%. Use the table below to decide whether your layout needs more, and adjust the area you enter accordingly.
|
Layout |
Wastage |
Why |
|
Straight lay / stack bond |
10% |
Single-axis cuts, offcuts reusable at the opposite wall |
|
Brick bond/offset |
10% |
Half-tile starts reusable at course ends |
|
Diagonal 45° |
15% |
Every perimeter tile cut on an angle, no offcut reuse |
|
Herringbone |
15–20% |
Angled cuts at both ends of every perimeter piece |
|
Chevron |
20% |
Pre-mitred tiles, near-zero offcut recovery |
|
Any layout, tiles 600mm+ |
Add 5% |
One miscut on a 60×120cm tile loses 0.72 m² |
Add a further 5% for any of these:
-
Tiled window reveals
-
Boxed-in pipework or a soil-pipe bulkhead
-
A shower niche
-
A non-rectangular room, a loft bathroom, or walls out of plumb
-
Natural stone, where colour variation forces tile selection during laying
For a cloakroom under 3 m², use 15% minimum regardless of layout. On a small area, one broken tile is a large share of the order.
How to Apply a Non-Standard Wastage Rate
The calculator's checkbox adds 10%. For a herringbone floor needing 20%, enter an area already uplifted by the difference:
Adjusted area = Net area × (1 + your rate) ÷ 1.10
A 4.08 m² herringbone floor at 20%: 4.08 × 1.20 ÷ 1.10 = 4.45 m² entered into the calculator, which then adds its own 10% to reach 4.90 m².
Alternatively, untick the 10% box and enter the fully uplifted area directly.
Tiles Per Square Metre by Format
One square metre divided by the coverage of a single tile. These figures are fixed arithmetic and do not vary by range.
|
Tile size |
Coverage per tile |
Tiles per m² |
|
20 × 20 cm |
0.04 m² |
25.00 |
|
30 × 30 cm |
0.09 m² |
11.11 |
|
25 × 50 cm |
0.125 m² |
8.00 |
|
30 × 60 cm |
0.18 m² |
5.56 |
|
45 × 45 cm |
0.2025 m² |
4.94 |
|
40 × 80 cm |
0.32 m² |
3.13 |
|
60 × 60 cm |
0.36 m² |
2.78 |
|
60 × 90 cm |
0.54 m² |
1.85 |
|
60 × 120 cm |
0.72 m² |
1.39 |
|
80 × 80 cm |
0.64 m² |
1.56 |
|
90 × 90 cm |
0.81 m² |
1.24 |
|
120 × 120 cm |
1.44 m² |
0.69 |
How Many Tiles Are in a Box?
Box quantity varies by range, so read it from the product page before ordering. Two of our most common bathroom formats:
|
Format |
Tiles per box |
Coverage per box |
|
60 × 60 cm |
4 |
1.44 m² |
|
60 × 120 cm |
2 |
1.44 m² |
Both work out to the same coverage per box, which makes mixing formats between floor and walls straightforward to price.
Enter your tiles-per-box figure into the calculator rather than leaving it blank. It is the difference between a box count you can order from and an estimate.
Use the Custom size option in the calculator for any format not in the dropdown, and enter the tile dimensions in centimetres.
Grout joints do not change the count at bathroom scale. A 3mm joint on a 60×60cm tile adds about 0.5% to effective coverage, well inside the wastage allowance.
How Much Tile Adhesive Does a Bathroom Need?
Adhesive consumption depends on the product, the trowel notch size, and whether tiles are back-buttered. The figures below come from the data sheets of the adhesives we stock.
|
Adhesive |
Walls |
Floors |
|
Mapei Keraquick rapid-set (grey and white) |
approx. 2–3 kg/m² |
approx. 3.5–5 kg/m² |
|
BritFlex S1 semi-rapid cementitious |
approx. 4 kg/m² at a 3mm bed — 5 m² per 20kg bag |
approx. 4 kg/m² at a 3mm bed |
Always confirm against the data sheet of the adhesive you actually buy. Coverage differs between products, and between a flat substrate and an uneven one.
What changes the quantity:
-
Trowel notch size. A larger notch lays a thicker bed. Small wall tiles take a 6mm notch; tiles from 300 to 600mm take 8–10mm; tiles over 600mm take 10–12mm.
-
Back-buttering. Every tile over 300 × 300mm needs adhesive on the back as well as the substrate. Add 20–30% to the estimate.
-
Substrate flatness. An uneven wall or floor absorbs more adhesive. Level it first, a levelling compound is cheaper than the extra adhesive and gives a better result.
-
Mixing losses. Add 10% for what stays in the bucket and on the trowel.
Selection rules for bathrooms:
-
Floors always take cementitious powder adhesive. Ready-mixed tub adhesive is wall-only and will not cure reliably under a floor tile.
-
Wet rooms, shower enclosures and underfloor heating need a flexible adhesive. Both Keraquick and BritFlex S1 are rated for underfloor heating.
-
Use white adhesive under white, translucent or light marble-effect tiles. Grey adhesive shows through a light body.
Worked example, same bathroom:
|
Surface |
Area |
Rate |
Adhesive |
|
Walls, 30×60cm |
18.47 m² |
3 kg/m² |
55.4 kg |
|
Floor, 60×60cm, back-buttered |
4.08 m² |
5 kg/m² + 25% |
25.5 kg |
|
Subtotal |
80.9 kg |
||
|
Plus 10% mixing loss |
89 kg → 5 × 20kg bags |
How Much Grout Does a Bathroom Need?
Grout consumption depends on joint length per square metre, joint width, and tile thickness. Small formats need far more grout than large ones because they generate more linear joints per square metre.
Grout kg/m² = Joint length per m² (m) × Joint width (m) × Tile thickness (m) × 1600
Joint length per m² = (1 ÷ tile length in m) + (1 ÷ tile width in m)
At a 3mm joint and 10mm tile thickness:
|
Tile size |
Joint length per m² |
Grout |
|
20 × 20 cm |
10.00 m |
0.48 kg/m² |
|
25 × 50 cm |
6.00 m |
0.29 kg/m² |
|
30 × 60 cm |
5.00 m |
0.24 kg/m² |
|
45 × 45 cm |
4.44 m |
0.21 kg/m² |
|
40 × 80 cm |
3.75 m |
0.18 kg/m² |
|
60 × 60 cm |
3.33 m |
0.16 kg/m² |
|
60 × 90 cm |
2.78 m |
0.13 kg/m² |
|
60 × 120 cm |
2.50 m |
0.12 kg/m² |
|
90 × 90 cm |
2.22 m |
0.11 kg/m² |
|
120 × 120 cm |
1.67 m |
0.08 kg/m² |
Scale proportionally for other joint widths; a 5mm joint uses 1.67× the 3mm figure. Add 30% for waste in the bucket, on the float, and in the sponge.
Joint width by tile type:
|
Tile type |
Joint |
|
Rectified porcelain |
2–3mm |
|
Standard ceramic wall tile |
2–3mm |
|
Floor tiles |
3–5mm |
|
Large format |
3–5mm |
|
Natural stone, uneven edges |
5–10mm |
Joints up to 3mm take unsanded grout. Joints of 3mm and above take sanded grout.
Use flexible silicone, not grout, at every internal corner and where wall tiles meet the floor, the bath rim or the shower tray. Those are movement joints and rigid grout will crack there.
Worked example: walls 18.47 m² at 0.24 kg/m² = 4.4 kg. Floor 4.08 m² at 0.16 kg/m² = 0.7 kg. Total 5.1 kg, plus 30% = 6.6 kg. Grout is stocked in 2kg, 5kg and 10kg units, so one 10kg bag covers this bathroom with spare for future repointing.
Will Your Walls Take the Tiles You Have Chosen?
Every wall substrate has a maximum tile weight it can safely carry, and large-format porcelain is heavy enough to reach it.
A 60×120cm porcelain tile weighs several kilograms on its own, and the adhesive bed adds more. Multiply that across a full wall, and the load on a skimmed plaster surface becomes a real question, not a theoretical one. Plaster and plasterboard have lower limits than render or a cement backer board.
What to do:
-
Find the tile weight. It is listed on the product page, per tile or per box. Divide by the coverage to get kilograms per square metre.
-
Add the adhesive bed. Use the figures in the adhesive section above.
-
Check the substrate limit. The relevant standard is BS 5385-1, which sets maximum tile weights by background type. Your plasterer, tiler or backer board manufacturer will have the current figure; it is published in every backer board technical data sheet.
-
If the load is close to or above the limit, fit a tile backer board. Cement backer board carries substantially more weight than skimmed plaster and is the standard solution for large-format tiles on a stud or plasterboard wall.
In a shower enclosure or wet room, fit backer board regardless of weight. Plasterboard degrades under prolonged moisture, whatever tanking sits above it. That is a moisture decision, not a loading one.
Run this check before you order, not after the pallet arrives. Changing the substrate is straightforward at the planning stage and expensive once the tiles are on site.
Why the Wastage Allowance Is Not Optional
Porcelain is fired in batches, and every box carries a shade code and a calibre code. A top-up order placed three weeks later will very likely come from a different batch, and the tonal difference is visible under bathroom lighting even where the code names match.
The wastage allowance is the only same-batch spare stock you will ever have. Order it short, and the choice is a visible mismatch or a re-tile.
Keep four to six tiles back after the job, store them flat and dry, and note the shade and calibre code somewhere permanent.
At larger volumes, check the pallet and job-lot break points before ordering by the box; the price per square metre changes on a full-house or multi-bathroom project.
Run Your Numbers
Enter your floor and wall figures into the tile calculator to get tiles, boxes and total square metres.
Choosing the Right Tile Size
Format changes the tile count, the wastage rate, the trowel size, the adhesive volume and the substrate requirement all at once. The premium bathroom tiles range lists coverage and tiles per box on every product, and the 30×60cm, 60×60cm and 60×120cm collections cover the three most common bathroom formats.
Slip Ratings for Bathroom Floors
Quantity is half the specification. Bathroom floors need a slip rating matched to the zone, with R11 the standard for shower floors and wet rooms. See non-slip bathroom floor tiles before committing to a format.
Half-Tiled Bathrooms
For layout and styling on half-height schemes, see half-tiled bathroom ideas.
Installation, Tanking and Setting Out
Setting out determines where your cuts fall, which determines whether your calculated wastage holds. The complete bathroom tiling guide covers datum lines, tanking, movement joints and cure times.
Adhesive, Grout and Backer Boards
Once quantities are set, the adhesive range, grout range and tile backer boards cover the materials list, including flexible adhesives rated for wet rooms and underfloor heating.
Order Samples First
Every figure above assumes the tile is chosen. Order a cut sample, hold it in the room in its own light, and confirm before committing to a pallet. The sample cost is refunded against the order.
Frequently Asked Questions
How do I calculate tiles for bathroom walls?
Multiply the room perimeter by the tiled height, deduct openings over 1 m², then add the area of any tiled window reveals. For a 2.4m × 1.7m room tiled full height to 2.4m, that is 19.68 m² gross, 18.17 m² after the door, and 18.47 m² once reveals are added.
How many tiles do I need for a half-tiled bathroom?
Multiply the perimeter by the tiled height only, then add the shower zone at full height separately. Set the tiled height to a whole number of tile courses so the top row needs no horizontal cut.
Do you deduct windows and doors when calculating bathroom tiles?
Deduct openings over 1 m². A standard internal door at 1.51 m² is deducted. A window under 1 m² is left in as a buffer, and its reveals are added back on top.
Do window reveals need extra tiles?
Yes. A 600 × 900mm window with 100mm reveals adds 0.30 m² across the two sides, head and sill, and raises the cut rate enough to justify an extra 5% wastage.
How many tiles are in a box?
It varies by range, so check the product page. Our 60×60cm tiles are supplied 4 to a box and 60×120cm 2 to a box, both covering 1.44 m² per box.
Should I tile behind the bath and under the vanity?
Tile the wall to floor level behind a removable bath panel, and tile the full floor under wall-hung units. Both cost a small amount now and prevent an exposed strip when fittings are replaced.
How much wastage do I need for herringbone bathroom tiles?
15–20%, against 10% for a straight lay. Herringbone cuts every perimeter tile at an angle on both ends, so offcuts cannot be reused.
How much tile adhesive do I need for a bathroom?
Around 2–3 kg/m² on walls and 3.5–5 kg/m² on floors for a rapid-set cementitious adhesive, before back-buttering and mixing losses. A typical three-piece bathroom needs about five 20kg bags.
How much grout do I need for a bathroom?
Between 0.08 and 0.48 kg/m² at a 3mm joint, depending on tile size. Small formats need up to six times more grout than large formats over the same area. Add 30% for waste.
Do I need backer board for large-format tiles on a bathroom wall?
Often yes. Large-format porcelain plus adhesive is heavy, and plaster and plasterboard carry lower maximum tile weights than cement backer board. Check the tile weight on the product page against the substrate limit in BS 5385-1. Inside a shower enclosure or wet room, fit backer board regardless.
What size grout joint should bathroom tiles have?
2–3mm for rectified porcelain and standard ceramic wall tiles, 3–5mm for floor and large-format tiles, and 5–10mm for natural stone with uneven edges. Joints up to 3mm take unsanded grout; 3mm and above take sanded.