





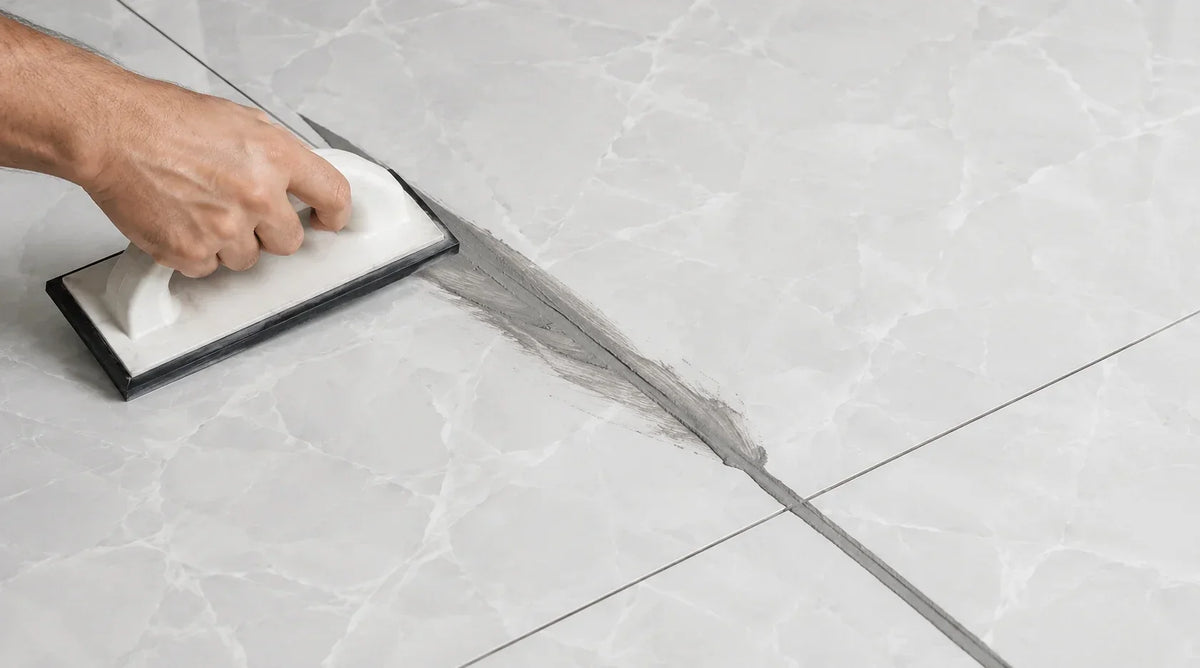
Grouting tiles is the process of filling the joints between fixed tiles with a cement-based or resin-based mortar. The grout locks the tiles together, keeps water and dirt out of the joints, and gives the surface its finished look. To grout tiles, wait until the tile adhesive has set. Then mix the grout to a smooth paste and press it diagonally into the joints with a rubber float. Wipe the surface with a damp sponge after 15–30 minutes, and buff off the dry haze with a clean cloth.
Quick guide: how to grout tiles in 7 steps
- Wait for the adhesive to set. That is 24 hours for standard-set adhesive on floors, or 3–4 hours with rapid-set adhesive.
- Prepare the joints. Remove the spacers, rake out squeezed-up adhesive and vacuum the gaps.
- Mix the grout. Pour the water in first, then add the powder, and mix at low speed. Rest the mix for 2–3 minutes, then stir again.
- Press grout into the joints. Hold the rubber float at 45° and sweep diagonally across the tiles.
- Scrape off the excess. Hold the float almost upright and pull it diagonally across the joints.
- Sponge after 15–30 minutes. Wipe diagonally with a well-wrung sponge, rinse it often, and shape the joints.
- Buff and protect. Polish off the haze with a dry microfibre cloth and keep off the surface until the grout is ready for traffic.
| At a glance | |
|---|---|
| Difficulty | Beginner-friendly |
| Time for a 5 m² bathroom floor | Roughly 1–2 hours, plus drying |
| Ideal room temperature | +5°C to +35°C |
| Grout needed for 60x60cm porcelain, 3mm joints | About 0.15 kg per m² |
| Ready for light foot traffic | About 3 hours (Mapei Ultracolor Plus) |
| Ready for normal use | 24 hours (Mapei Ultracolor Plus) |
What does grout do between tiles?
Grout does four jobs in a tiled surface.
- It locks the tiles together. A full grout joint stops tile edges chipping and spreads load across the surface.
- It keeps water and dirt out. Grout stops water, food and dust getting into the joint and the adhesive bed.
- It absorbs small tolerances. Tiny differences in tile size are hidden inside a consistent joint line.
- It finishes the design. The colour and width of the grout line changes how a tiled wall or floor looks.
Grout is not a waterproofing layer. In showers and wet rooms, the waterproofing is the tanking membrane behind the tiles. Grout is the water-resistant top layer.
What tools and materials do you need to grout tiles?
You need a rubber grout float, a grout sponge, two buckets, and the right grout for your joint width. The full kit is listed below.
| Item | What it does | Tip |
|---|---|---|
| Cement-based grout (powder) | Fills the joints | Buy one batch number for the whole job so the colour matches |
| Rubber grout float | Presses grout into the joints | A soft, clean rubber face won't scratch polished porcelain |
| Mixing bucket + clean water | Mixing | Measure the water. Don't guess |
| Drill with paddle mixer (low speed) or gauging trowel | Mixes the grout smoothly | Keep the drill slow to avoid trapping air |
| Grout sponge (large, dense) | Cleans the tile face and shapes joints | Hydrophilic grout sponges hold less water |
| Second bucket of clean water | Rinsing the sponge | The two-bucket method stops you smearing dirty water back on |
| Grout rake or old flat screwdriver | Clears adhesive out of joints | Clear it before grouting, not after |
| Vacuum | Removes dust from joints | Dust stops grout bonding |
| Grout finishing tool | Gives neat, even joints | A rounded tool handle also works |
| Microfibre cloths | Buffs off haze | Use dry, clean cloths only |
| Masking tape | Protects trims, worktops and bath edges | Remove it before the grout hardens |
| Kitchen scales + measuring jug | Mixing part bags | Lets you mix small batches in the right ratio |
| Gloves, knee pads, safety glasses | Protection | Cement grout is alkaline and irritates skin |
How soon after tiling can you grout?
You can grout wall tiles 4–8 hours after fixing them with standard adhesive. On floors, wait 24 hours. With rapid-set adhesive, you can grout walls after 1–2 hours and floors after 3–4 hours. These are Mapei's published wait times for Ultracolor Plus grout.
| Tiles fixed with | Walls: grout after | Floors: grout after |
|---|---|---|
| Standard-set cement adhesive | 4–8 hours | 24 hours |
| Rapid-set cement adhesive | 1–2 hours | 3–4 hours |
| Sand and cement mortar bed | 2–3 days | 7–10 days |
Source: Mapei Ultracolor Plus technical data sheet. Always check the adhesive bag as well. Its "ready to grout" time takes priority.
Can you tile and grout on the same day? Yes, if you use a rapid-set adhesive and wait for the times shown above. With standard-set adhesive, grout floors the next day. Grouting too early lets water from the grout soak into soft adhesive, and walking on the tiles can knock them out of level.
A simple test helps. Press a fingernail into adhesive squeezed into a joint. If it dents, wait longer.
How do you prepare tile joints before grouting?
Prepare the joints by removing the spacers, raking out excess adhesive and vacuuming out the dust. Clean joints let the grout fill the full depth and bond properly.
- Remove the tile spacers. Standard cross spacers and levelling-clip caps should come out before grouting. Grout over a spacer is thin and shows a different shade.
- Rake out the adhesive. Clear the joint to at least two-thirds of the tile's thickness. On a 9.5mm porcelain tile, that is a clear depth of about 6–7mm.
- Vacuum the joints and wipe the tiles. Dust and adhesive smears weaken the bond and cause patchy colour.
- Leave movement joints empty. Do not grout internal corners, the joint where walls meet floors, the edge along a bath or shower tray, or planned floor movement joints. These gaps flex, so they are sealed with silicone instead.
- Tape vulnerable edges. Mask off trims, worktops and bath edges.
- Check the conditions. Grout between +5°C and +35°C. Avoid direct sun, draughts and underfloor heating that is switched on.
- Test on a spare tile. On polished or light porcelain, rub a little of your grout colour onto an offcut and wipe it off. This confirms the grout cleans off the surface without marking.
How do you mix grout to the right consistency?
Mix grout by adding the powder to measured water. Stir at low speed until smooth, then leave it to rest for 2–3 minutes and stir again briefly. The right consistency is a smooth, creamy paste, like thick yoghurt or smooth peanut butter. It should hold on a float tilted at 45° without sliding off.
How much water do you add to grout? For Mapei Ultracolor Plus, Mapei specifies 21–23 parts water to 100 parts powder by weight. That works out as:
| Bag or batch size | Water to add |
|---|---|
| 5kg bag | 1.05–1.15 litres |
| 2kg bag | 0.42–0.46 litres |
| 1kg part batch | 210–230 ml |
| 500g part batch | 105–115 ml |
For any other brand, use the ratio printed on the bag.
Mixing rules that prevent most grout problems:
- Water first, then powder. This stops dry lumps sticking to the bottom of the bucket.
- Use a low speed. A fast drill whips air into the grout, which causes pinholes later. Mapei specifically recommends a low-speed mixer.
- Let it slake. Resting for 2–3 minutes lets the additives activate. Re-stir briefly before use.
- Mix only what you can use in the pot life. Mapei Ultracolor Plus stays workable for 20–30 minutes. Ultra Tile Fix ProGrout Flexible stays workable for 30–60 minutes.
- Never add water to stiffening grout. Re-watering (retempering) weakens the grout and causes colour patches. Mix a fresh batch instead.
- Use the same water ratio for every batch. Different water amounts dry to different shades.

How do you apply grout to tiles?
Apply grout by loading the rubber float and pressing the grout into the joints at a 45° angle. Sweep diagonally across the tiles so the float edge never runs along a joint and drags grout out. Work in areas of about 1–2 m² at a time.
- Load the float. Scoop a generous amount of grout onto the face of the float.
- Press it in at 45°. Hold the float at roughly 45° to the tile face. Push the grout into the joints with firm, diagonal strokes, then go back over each joint in the other diagonal direction to fill any gaps.
- Pack the joints fully. The joint should be completely full, with no air pockets or low spots.
- Scrape off the excess. Turn the float almost upright (close to 90°) and pull it diagonally across the tiles. This removes most of the grout from the tile face and makes sponging easier.
- Move to the next section. Keep an eye on the clock. The first section will soon be ready for sponging.
How do you grout floor tiles?
Grout floor tiles by starting in the corner furthest from the door and working back towards your exit. That way you never have to kneel or step on fresh grout. On a large floor, grout and sponge one section at a time before moving on. Kneel on a board or foam pad on tiles you have already cleaned, never directly on wet grout lines.
How do you grout wall tiles?
Grout wall tiles from the top of the wall downwards, in sections about an arm's width across. Push the float upwards and diagonally so the grout is packed up into horizontal joints rather than sagging out of them. Any drips fall onto ungrouted areas below, which you have not cleaned yet.
How do you grout a shower?
Grout a shower in the same way as a wall, but leave every internal corner and the joint along the shower tray or bath empty. Those joints are sealed with a sanitary silicone once the grout is dry. Grout cracks in these places because the walls and tray move slightly. Wait until the grout is ready for service (24 hours for Mapei Ultracolor Plus) before using the shower.
How do you grout large format tiles such as 60x60cm and 60x120cm?
Grout large format tiles in the same way, but press harder along the narrow joints. Rectified 60x60cm, 60x120cm and 80x80cm porcelain is normally laid with 2–3mm joints, so the float must push grout deep into a thin gap. Large tiles use much less grout per square metre than small tiles because there are fewer joints. Make sure the tiles are level first: grout cannot hide lippage (height differences) between large tiles.
How do you grout mosaic tiles?
Grout mosaic tiles in smaller sections, because mosaics have many more joints per square metre and use far more grout. Sponge more gently so you don't pull grout out of the tiny joints or loosen sheet-mounted pieces. Rinse the sponge more often.
How do you grout around tile trims?
Fill the joint between the tile and the trim flush with the tile face, but do not spread grout over the trim itself. Tape metal and chrome-effect trims before you start, and wipe them clean straight after grouting.
When and how do you clean grout off the tiles?
Clean grout off the tile face 15–30 minutes after applying it, once the grout in the joints has firmed up. Press a fingertip on a joint. If the grout holds its shape but still takes a slight mark, it is ready to sponge.
- Wring out the sponge well. It should be damp, not dripping. Excess water washes cement out of the joints and weakens the surface.
- Wipe diagonally in light, sweeping strokes. Flip the sponge to a clean side after each stroke.
- Use two buckets. Rinse the dirty sponge in the first bucket, then dip it in the clean second bucket before wringing it out.
- Shape the joints. Run a grout finishing tool or the rounded end of a handle along each joint for a neat, slightly concave finish just below the tile edge.
- Fill any pinholes or low spots straight away. Press in a little fresh grout with your fingertip and sponge it level.
- Buff off the haze. After the surface has dried, polish off the thin cement film with a clean, dry microfibre cloth.

How do you remove grout haze the next day? Light haze usually buffs off with a dry microfibre cloth or a slightly damp one. If a hard film remains, use a dedicated grout haze remover and follow its instructions, including how long to wait after grouting. Do not use strong acid cleaners on fresh cement grout. Our guide to cleaning bathroom tiles and grout explains haze removal for each tile type.
How long does grout take to dry before you walk on it or use the shower?
Fast-setting grouts like Mapei Ultracolor Plus take light foot traffic after about 3 hours and are ready for normal use after 24 hours. Standard cement grouts usually need 24 hours before walking and up to 72 hours before they get wet.
| Grout | Pot life | Light foot traffic | Normal use / showers |
|---|---|---|---|
| Mapei Ultracolor Plus (CG2WA) | 20–30 min | About 3 hours | 24 hours (48 hours for pools) |
| Ultra Tile Fix ProGrout Flexible | 30–60 min | After setting (12 hours) | Follow the bag; allow at least 24 hours |
| Standard cement grout | Check bag | Around 24 hours | 48–72 hours |
Cold, damp rooms slow drying down. Warm, dry rooms speed it up. For a full breakdown of drying and curing by grout type and room, see how long grout takes to dry.
In hot, dry or windy conditions, lightly misting the joints with water helps the grout cure. Mapei notes that damp curing improves the grout's final properties. If the floor has underfloor heating, keep it switched off while the adhesive and grout cure. Then bring the temperature up slowly, following the heating manufacturer's commissioning instructions. Our guide to laying porcelain floor tiles over underfloor heating covers this step.
Which grout should you use for your tiles?
Use a flexible, polymer-modified cement grout rated CG2WA for most porcelain and ceramic tiles in UK bathrooms and kitchens. It suits walls and floors, wet areas and underfloor heating. Use an epoxy (RG) grout only where you need chemical or stain resistance, such as commercial kitchens or swimming pools.
What do grout classes like CG2WA mean? In the UK and Europe, grout is classified under the standard EN 13888:
| Code | Meaning | What it tells you |
|---|---|---|
| CG | Cementitious grout | A cement-based powder grout |
| CG1 | Normal cementitious grout | Basic performance |
| CG2 | Improved cementitious grout | Better strength and performance |
| W | Reduced water absorption | Better for bathrooms, showers and kitchens |
| A | High abrasion resistance | Better for floors and busy areas |
| RG | Reaction resin grout | Epoxy grout: stain- and chemical-resistant, harder to apply |
Sanded or unsanded grout? US guides talk about "sanded" and "unsanded" grout. UK grouts are sold by joint width instead. A modern cement grout like Mapei Ultracolor Plus covers joints from 2mm to 20mm in one product, so you rarely need to choose between the two.
Grouts we stock (prices checked September 2026):
| Grout | Class / type | Joint width | Bag | Price | Colours |
|---|---|---|---|---|---|
| Mapei Ultracolor Plus | CG2WA, fast-setting, flexible, water- and mould-repellent | 2–20mm | 5kg | £34.99 (Manhattan Grey 110: £29.99) | White 100, Silver Grey 111, Manhattan Grey 110, Medium Grey 112, Cement Grey 113, Anthracite 114, Black 120, Beige 132 |
| Mapei Ultracolor Plus | As above | 2–20mm | 2kg | £29.99 | White 100, Silver Grey 111, Manhattan Grey 110, Black 120 |
| Ultra Tile Fix ProGrout Flexible | Polymer-modified flexible, mould-resistant | 1–20mm | 3kg | £16.99 | White, Grey, Silver Grey |
Prices and stock can change. The live price is always on the product page.
Mapei Ultracolor Plus suits most bathroom and kitchen jobs. It sets quickly, resists water and mould, is anti-efflorescence (helping prevent white salt bloom) and works indoors and outdoors. Mapei Ultracolor Plus 100 White is a clean match for white and marble-effect walls. Ultra Tile Fix ProGrout Flexible is a lower-cost option with a longer 30–60 minute working time, which helps first-time DIYers. It is designed for areas with movement, such as underfloor heating and wet rooms. You can compare every colour and bag size in our tile grout collection.
What grout joint width should you use?
Use a 2–3mm joint for rectified porcelain tiles and a 3–5mm joint for non-rectified (cushion-edged) tiles. Match your spacer size to the joint width you want, and check that your grout is rated for that width.
| Tile type | Typical joint width | Why |
|---|---|---|
| Rectified porcelain: 60x60, 60x120, 80x80, 90x90cm | 2mm walls / 3mm floors | Machine-cut edges allow tight, uniform joints |
| Non-rectified (cushion-edge) porcelain or ceramic | 3–5mm | Wider joints hide small size variations |
| Wall ceramic, e.g. 30x60cm | 2–3mm | Walls carry no foot traffic |
| Mosaic sheets | Set by the sheet (usually 2–3mm) | Joints are fixed by the backing mesh |
| Outdoor porcelain | Wider, per tile and grout instructions | Allows for temperature movement |
UK tiling guidance (BS 5385) generally calls for slightly wider joints on floors than on walls, because floors move more. For the difference between rectified and non-rectified edges, read our guide to rectified porcelain tiles.
How much grout do you need?
A 60x60cm porcelain floor tile with 3mm joints needs about 0.15 kg of grout per square metre. A 60x120cm tile with 3mm joints needs about 0.11 kg per m². Smaller tiles, thicker tiles and wider joints all need more.
Grout coverage formula (Mapei's published method, all sizes in mm):
Grout (kg/m²) = (tile length + tile width) ÷ (tile length × tile width) × tile thickness × joint width × 1.6
The 1.6 figure is the approximate density of mixed cement grout in kg per litre.
Worked example: a 12 m² bathroom floor in 60x60cm porcelain, 9.5mm thick, with 3mm joints
- (600 + 600) ÷ (600 × 600) = 0.00333
- 0.00333 × 9.5 × 3 × 1.6 = 0.152 kg per m²
- 0.152 × 12 m² = 1.82 kg
- Add 10% for waste: about 2.0 kg
A 2kg bag would be cutting it fine, so buy one 5kg bag. The leftover grout is useful for touch-ups.
Grout per m² and coverage per 5kg bag (9.5mm porcelain, before wastage):
| Tile size | 2mm joints | 3mm joints | 5mm joints | 5kg bag covers (3mm joints) |
|---|---|---|---|---|
| 30x60cm | 0.15 kg/m² | 0.23 kg/m² | 0.38 kg/m² | about 21 m² |
| 60x60cm | 0.10 kg/m² | 0.15 kg/m² | 0.25 kg/m² | about 32 m² |
| 60x120cm | 0.08 kg/m² | 0.11 kg/m² | 0.19 kg/m² | about 43 m² |
| 80x80cm | 0.08 kg/m² | 0.11 kg/m² | 0.19 kg/m² | about 43 m² |
| 90x90cm | 0.07 kg/m² | 0.10 kg/m² | 0.17 kg/m² | about 49 m² |
Mosaic tiles need far more grout per m². Use the formula with the mosaic chip size, or see our mosaic kitchen tiles grout and size guide.
What grout colour should you choose?
Choose a grout colour close to the tile's background colour for a seamless look. Choose a contrasting colour to show off the tile shape or layout. On floors, a mid-grey or beige grout hides everyday dirt better than bright white.
- White and cream tiles: White 100 or Silver Grey 111 for a clean, seamless finish.
- Grey stone- and concrete-effect tiles: Manhattan Grey 110, Medium Grey 112 or Cement Grey 113.
- Black, dark marble and onyx-effect tiles: Anthracite 114 or Black 120.
- Beige, travertine and warm stone-effect tiles: Beige 132.
Wet grout looks different from dry grout. Grout a spare tile, let it dry, and view it in the room's own light before you commit. Our beige floor tiles guide shows grout colour pairings in real rooms.

What are the most common grouting mistakes, and how do you fix them?
Most grouting problems come from three causes: grouting too early, using too much water, or sponging too soon. The table below links each problem to its cause and the fix.
| Problem | Likely cause | How to fix or prevent it |
|---|---|---|
| Hairline cracks in grout | Grouted before the adhesive set; mix too wet; grout used in corners or movement joints | Wait the full adhesive time; measure water; use silicone in corners and at tray/bath edges |
| Pinholes and tiny holes | Air whipped in by fast mixing; joints not packed; sponged too early | Mix at low speed; press in two diagonal directions; fill holes while the grout is fresh |
| Patchy or blotchy colour | Different water amounts per batch; over-wet sponge; mixed batch numbers | Weigh water for every batch; wring the sponge; buy one batch number |
| Low or dished joints | Sponge too wet or too much pressure | Light, diagonal strokes; fill low spots with fresh grout straight away |
| Grout pulled out of joints | Float or sponge run along the joint line | Always work diagonally across joints |
| Cloudy haze on tiles | Residue left too long | Buff with a dry microfibre cloth; use a haze remover if it has hardened |
| White powdery bloom (efflorescence) | Salts carried to the surface by excess water | Use less water; an anti-efflorescence grout such as Ultracolor Plus helps |
| Grout dries before you can sponge | Batch too big; hot room; sun or heating on | Mix smaller batches; work smaller sections; heating off |
| Tiles move while grouting | Adhesive not set | Stop, and wait the full "ready to grout" time |
If your grout is already cracked, crumbling or mouldy after years of use, the fix is to rake it out and grout again. Follow our step-by-step guide on how to regrout tiles.
Do you need to seal grout after grouting?
Sealing is optional with a water-repellent grout like Mapei Ultracolor Plus, and most porcelain and glazed ceramic tiles do not need sealing at all. A grout sealer adds extra stain protection in showers and on light-coloured kitchen floors. Apply it only after the grout has fully cured, following the sealer's own waiting time. Natural stone tiles are different: they usually need sealing before grouting so the grout doesn't stain the stone.
Can you grout over old grout?
No. New grout needs a clean joint to bond to, and a thin layer over old grout soon cracks and flakes off. Rake out the old grout first, then grout the joints again. Our regrouting guide explains how deep to rake out and which tools to use.
Grouting tiles FAQs
Should you remove tile spacers before grouting?
Yes. Remove the spacers before grouting so the grout fills the full joint depth. Grout over a buried spacer is thin, can crack, and often dries a different shade.
How deep should grout go?
Grout should fill the joint to at least two-thirds of the tile thickness, and ideally the full depth. Finish it just below the tile edge.
Can you grout tiles in cold weather?
Grout between +5°C and +35°C. Below 5°C, cement grout sets very slowly and may not reach full strength. Heat the room gently the day before, but keep underfloor heating off.
Do you grout the corners of a shower?
No. Internal corners, the joint along the shower tray or bath, and wall-to-floor joints are movement joints. Seal them with sanitary silicone after the grout is dry.
Is grout waterproof?
No. A CG2W grout has reduced water absorption, and a water-repellent grout sheds splashes, but grout is not a waterproof barrier. Showers and wet rooms need a tanking system behind the tiles.
Can you use a drill to mix grout?
Yes. A drill with a paddle mixer at low speed gives a smooth, lump-free mix. Avoid high speed, because it traps air and causes pinholes.
How long can mixed grout sit before you use it?
Only for its pot life. That is 20–30 minutes for Mapei Ultracolor Plus and 30–60 minutes for Ultra Tile Fix ProGrout Flexible. Throw away grout that has started to stiffen. Don't add water to it.
How long does it take to grout a bathroom?
A small bathroom floor of about 5 m² takes most DIYers roughly 1–2 hours to grout and clean. Walls take longer because of cuts, trims and corners. Allow a full day for a fully tiled bathroom, plus drying time.
Can you grout outdoor tiles with the same grout?
Mapei Ultracolor Plus is suitable for exterior walls and floors. Outdoor porcelain, especially 20mm slabs, is often laid with wider joints, so check that the joint width is within your grout's range (2–20mm for Ultracolor Plus).
What happens if you leave grout haze too long?
The cement film hardens and becomes difficult to buff off. You then need a dedicated grout haze remover. Buffing on the same day avoids this.
Last thoughts on how to grout tiles
Good grouting comes down to timing and water control. Wait for the adhesive to set, and measure the water for every batch. Press the grout in diagonally at 45° and sponge with a well-wrung sponge after 15–30 minutes. Leave the corners and movement joints for silicone. Get those steps right and your grout lines will stay crack-free, even and easy to clean for years.
If you are still fixing your tiles, pick a matching setting product from our tile adhesive range. Browse our 60x60cm floor tiles to see the rectified porcelain these grout figures are based on.