





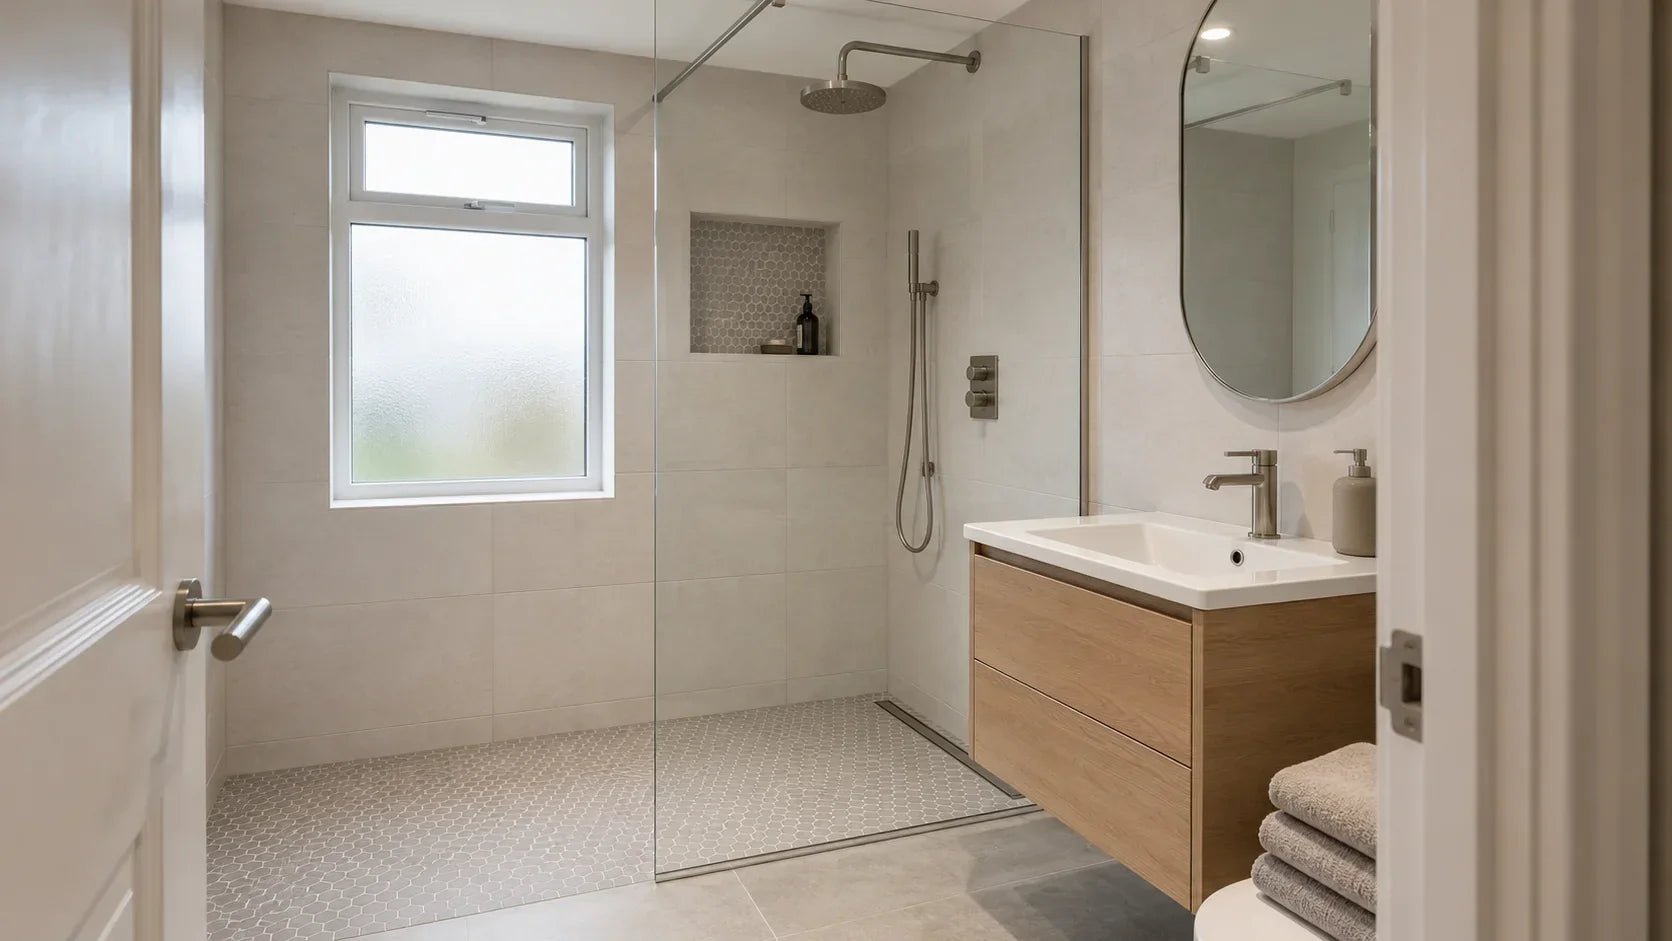
Mosaic bathroom tiles are small pieces of glass, ceramic, porcelain, natural stone or shell, supplied individually or on sheets for shower floors, walls, niches and bathroom splashbacks. In a UK bathroom, the right mosaic depends on the exact zone: floor-rated tiles with suitable wet-slip evidence for floors, low-porosity products for showers, and a complete waterproofing system behind every installation exposed to regular water.
Mosaics solve details that larger tiles often cannot. Their small pieces can follow a shower fall, wrap a gentle curve, frame a recess or introduce pattern without covering every surface. They also create more joints, need careful sheet alignment and can cost far more per square metre than the price of one sheet first suggests. A sound buying decision therefore starts with suitability and system compatibility, not colour alone.
Which mosaic bathroom tile is best for each area?
Use the table as a first filter. The product data sheet and the installation-system instructions remain the final authority.
|
Bathroom area |
Strong starting choice |
Evidence to request |
Main risk to avoid |
|
Shower floor |
Small matt porcelain mosaic rated by its maker for shower floors |
Wet-slip or barefoot test data, water absorption, floor suitability |
Choosing a glossy wall-only mosaic because the extra grout lines look grippy |
|
Wet-room floor |
Floor-rated porcelain mosaic that can follow the designed fall |
Wet-condition slip data, compatible tanking and drainage details |
Treating tiles and grout as the waterproof layer |
|
General bathroom floor |
Porcelain or floor-rated ceramic mosaic |
Floor-use classification, wet slip data, underfloor-heating compatibility where needed |
Using a delicate glass, shell or wall-only product |
|
Shower wall |
Porcelain, ceramic or glass mosaic approved for the chosen wet area |
Wet-area approval, backing compatibility, adhesive and grout guidance |
Mesh, paper or glue that is incompatible with prolonged moisture |
|
Basin splashback |
Ceramic, porcelain, glass or sealed stone |
Cleaning and chemical-resistance guidance |
Selecting a highly textured finish that traps residue behind taps |
|
Bath panel or feature wall |
Most wall-rated mosaics |
Wall suitability, substrate weight limit and edge detail |
Letting pattern overwhelm a compact room |
|
Niche and shelf |
Low-porosity mosaic with planned trims and falls |
Edge profile, sealant detail and drainage fall |
Flat shelves that hold water and exposed unfinished edges |
|
Steam shower |
Only a tile and complete system specifically approved for the environment |
Written tile, adhesive, grout, membrane and vapour-system approval |
Assuming ordinary shower suitability also covers steam exposure |
Quick buying rule
For a wet floor, prioritise documented wet grip, low water absorption, cleanability and a compatible waterproofing system. For a wall, prioritise wet-area approval, backing compatibility, colour consistency and ease of cleaning. For translucent glass, add a suitable white adhesive to the specification. For natural stone or shell, confirm sealing, cleaner compatibility and whether the exact product is approved for that location.
What counts as a mosaic tile?
A mosaic is a group of small tile pieces, sometimes called tesserae, arranged as a repeated pattern or picture. Modern bathroom mosaics are commonly mounted on mesh, held by dots between pieces, or face-mounted with removable paper or film. A sheet sold as roughly 300 x 300 mm may contain dozens of pieces, but sheet dimensions, joint widths and actual coverage vary by product.
The sheet is an installation aid. It does not turn a wall tile into a floor tile, make a porous material waterproof or guarantee that a backing is suitable for a shower. Check the complete product, including the material, finish, backing, adhesive contact area and intended use.
Which product details should you check before buying?
Compare the practical details before choosing a design name or colour.
|
Check first |
Details to compare |
Why they matter |
|
Suitability |
Material, wall or floor use, wet-area approval, slip evidence, water absorption, sheet size, piece size and thickness |
These determine whether the tile can safely and durably serve the intended area |
|
Appearance and care |
Finish, shape, colour variation, edge finish, backing type, stain resistance and cleaning instructions |
These affect how the finished surface looks and how much maintenance it needs |
|
Special requirements |
Underfloor heating, steam exposure, curved walls, commercial traffic, recycled content or specialist coatings |
These need written confirmation for the exact product and project |
What types of mosaic tiles are suitable for bathrooms?
Porcelain mosaic tiles
Porcelain is usually the safest all-round starting point for a frequently used bathroom floor. It is dense, generally low in water absorption and available in matt, textured and decorative finishes. A product still needs to be explicitly floor rated, and its wet-slip evidence must suit the location. Porcelain is also a strong candidate for high-traffic bathrooms and properly designed underfloor-heating systems.
Choose porcelain when durability, low routine maintenance and a consistent technical specification matter more than translucency. It can imitate marble, terrazzo, encaustic pattern or natural stone while avoiding some of the sensitivity of the original material.
Ceramic mosaic tiles
Ceramic mosaics provide broad colour and pattern choice at accessible price points. Glazed ceramic is easy to wipe on walls and splashbacks, but not every ceramic mosaic is dense enough, strong enough or slip resistant enough for a shower floor. Check the individual product rather than relying on the word ceramic.
Ceramic is often a good wall choice where weight, colour and budget are the main considerations. For a floor, require an explicit floor-use statement and suitable test evidence.
Glass mosaic tiles
Glass mosaics reflect light and can make niches, shower walls and splashbacks feel deeper or brighter. Clear, translucent and iridescent finishes may reveal adhesive ridges, uneven coverage or colour variation behind the sheet. A compatible white adhesive and a carefully flattened, fully supported bed are commonly required.
Glass is non-porous at the face, but a glass mosaic installation is not automatically waterproof. The joints, backing, adhesive, substrate and movement details remain part of the system. Polished glass can be slippery and may scratch, so use it on a floor only when the manufacturer specifically approves that product and provides appropriate wet-use data.
Natural stone mosaic tiles
Marble, limestone, travertine and other stone mosaics bring natural variation that printed products cannot exactly repeat. That variation also makes sampling, batch selection and dry layout more important. Many stones are porous or sensitive to acids, pigments and some adhesives. They may need a compatible impregnating sealer before or after grouting, depending on the stone and system.
Natural stone can work on walls and some floors, but it carries a higher maintenance burden. Confirm stain sensitivity, wet slip, sealer, grout and cleaner compatibility before purchase.
Pearl shell and iridescent mosaics
Pearl shell can create a luminous luxury finish on a dry feature wall or selected splashback. It is not a universal shower-floor material. Shell, coatings and backing adhesives can respond differently to water, heat, UV exposure and cleaning chemicals. Obtain written location approval and care instructions for the exact product.
Recycled glass and mixed-material mosaics
Recycled glass can reduce demand for virgin material, but recycled content alone does not make a product environmentally preferable. Ask for the percentage of recycled content, manufacturing location, credible environmental documentation, packaging details, replacement availability and expected service life.
Mixed sheets may combine glass, stone, ceramic and metal. They inherit the limitations of the most sensitive component. One cleaner, adhesive or installation zone may not suit every element, so a mixed sheet needs a system-level check.

Glass vs ceramic vs porcelain mosaic bathroom tiles
|
Factor |
Glass |
Ceramic |
Porcelain |
Natural stone or shell |
|
Typical visual effect |
Reflective, translucent or iridescent |
Wide colour and glaze choice |
Matt, stone-effect, patterned or textured |
Unique natural variation and luxury character |
|
Water behaviour |
Face is non-porous, but the assembly is not waterproof |
Varies by body and glaze |
Usually very low absorption |
Often porous or chemically sensitive |
|
Best starting use |
Walls, niches and splashbacks |
Walls and approved light-duty floors |
Floors, wet rooms, showers and walls when rated |
Selected walls or approved floors with extra care |
|
Wet-floor suitability |
Product-specific and often limited |
Product-specific |
Commonly available, but still product-specific |
Requires close scrutiny of slip and maintenance |
|
Adhesive consideration |
Often white, compatible adhesive with full support |
Product and background determine adhesive |
A suitable cement-based or resin system is commonly specified |
Colour, moisture and staining sensitivity affect choice |
|
Cleaning |
Shows scale and smears; avoid abrasives |
Usually straightforward on glazed faces |
Usually straightforward |
Often needs pH-neutral products and possible resealing |
|
Durability |
Hard face but edges can chip and surfaces can scratch |
Good on walls; floor durability varies |
Usually strongest for heavy domestic use |
Varies; some surfaces etch, stain or abrade |
|
Cost tendency |
Mid to premium |
Value to mid-range |
Value to premium |
Premium to very high |
Is glass or ceramic more durable in a bathroom?
Neither material wins in every location. Glazed ceramic often tolerates routine wall cleaning well and costs less. Glass does not absorb water through its face, but it can reveal installation defects, scratch and chip at exposed edges. For a busy bathroom floor, a suitably rated porcelain mosaic is generally a more dependable starting point than either decorative wall glass or wall-only ceramic.
Are mosaic bathroom tiles waterproof?
No. Mosaic tiles, grout and sealant do not by themselves form the primary waterproofing system. Some tile faces absorb very little water and some grouts resist water well, but water can still reach joints, edges, penetrations or movement points. A shower or wet room needs a correctly designed substrate, waterproof membrane or tanking system, sealed penetrations, drainage falls and compatible fixing products.
The tile finish protects and decorates the system. It should not be expected to rescue a leaking background.
What makes a shower or wet-room mosaic installation reliable?
-
A stable substrate suitable for the load and environment.
-
Falls formed in the substrate so water reaches the drain without ponding.
-
A compatible waterproofing system with reinforced corners and sealed penetrations.
-
A drain and membrane connection designed as one detail.
-
Mosaic backing that allows the required adhesive contact and remains stable in moisture.
-
Adhesive suitable for the substrate, tile material and service condition.
-
Grout suitable for the joint width, material and cleaning regime.
-
Flexible sealant and movement joints where the design requires them.
-
The full curing period before water exposure.
Is waterproof grout enough for mosaic bathroom tiles?
No. A water-resistant cement grout or an epoxy grout can reduce absorption and improve stain or chemical resistance, but neither replaces tanking. Epoxy can be useful in demanding wet areas when it is compatible with the mosaic, yet it is more exacting to place and clean. Changes of plane, such as wall-to-floor and internal corners, normally need the specified flexible movement seal rather than being packed rigidly with grout.
Are mosaic bathroom floor tiles safe when wet?
They can be, but small pieces and many grout joints are not proof of safety. The finish, contaminant, slope, footwear or bare feet, cleaning regime and drainage all change slip risk. Ask for test evidence that reflects the intended wet condition.

A Pendulum Test Value of 36 or above is commonly used in UK slip-risk assessment as an indicator of low slip potential in the test condition. It is useful evidence, not a lifetime guarantee for a domestic shower. Ramp classifications such as an R rating are based on shod-foot testing and should not be treated as a direct substitute for barefoot wet-area evidence. For a shower floor, seek a product explicitly approved for that use and ask what wet or barefoot test supports the claim.
How to choose non-slip mosaics for a bathroom floor
-
Prefer a matt or structured surface over a polished finish.
-
Confirm that the exact colour and finish, not just the wider range, is floor rated.
-
Request the test method, result and test condition rather than accepting "anti-slip" as a standalone claim.
-
Check whether the evidence covers wet barefoot use if the tile is for a shower or wet room.
-
Make sure the mosaic can follow the designed falls without raised edges or standing water.
-
Plan routine cleaning, because soap film can reduce grip on an otherwise suitable surface.
-
Reassess risk for children, older users and anyone with limited mobility.
What UK standards and project rules should be checked?
Bathroom tiling is not governed by one simple product badge. The applicable specification depends on the surface and conditions. BS 5385-1:2018 covers internal ceramic, natural stone and mosaic wall tiling in normal conditions. BS 5385-3:2024 covers internal and external ceramic, mosaic, natural stone and related floor tiling in normal conditions. Shower areas and other special conditions require the relevant special-condition guidance, system instructions and project design.
British Standards are technical codes of practice, not a blanket planning permission or a substitute for Building Regulations. A bathroom project may also engage rules for structure, ventilation, drainage, electrical work and moisture control. Electric underfloor heating and bathroom lighting should be specified and connected by a competent person under the applicable electrical requirements. If the project changes drainage, structure or electrical circuits, confirm the approval and notification route before work begins.
For any product marketed with slip, antibacterial, UV-resistant, recycled-content or commercial-use claims, request the underlying test or declaration. A marketing label without a test method, measured result and scope is not enough to specify a safety-critical floor.
How much do mosaic bathroom tiles cost in the UK?
Mosaic bathroom tile prices vary too widely for one dependable UK figure. Ceramic and porcelain sheets normally cost less than handmade glass, natural stone or pearl shell, but a low sheet price can still become expensive once its coverage is converted to square metres.
Tiles Paradise did not display a dedicated mosaic collection with a reliable store-wide mosaic price range when this guide was checked on 15 August 2026. The broader bathroom collection includes ceramic and porcelain tiles, but those prices should not be presented as mosaic prices. For an accurate mosaic budget, use the live price and coverage of the exact sheet being considered.
What Tiles Paradise's 2026 cost guide says about labour
The Tiles Paradise bathroom tiling cost guide estimates standard UK bathroom tiling labour at about £30 to £60 per m². It gives day-rate guides of £180 to £280 outside London and £250 to £400 in London and the South East. The same guide estimates that a tiler may place about 3 to 5 m² of mosaic per day, compared with 8 to 12 m² of ordinary floor tile. That slower output helps explain why mosaic labour often costs more than a simple straight-laid installation.
These are planning figures, not a quotation. A niche, curved wall or small shower floor can cost more per m² because setting out, cutting and cleaning time remain high even when the tiled area is small.
|
Budget item |
How to calculate it |
What can increase it |
|
Mosaic tiles |
Exact sheet price multiplied by complete sheets required |
Material, finish, handmade work, small sheet coverage and batch availability |
|
Waste |
Start with 10% for a simple layout and around 15% for a busy or diagonal pattern |
Curves, niches, fragile pieces, borders and complex pattern matching |
|
Preparation |
Quote after the wall or floor is inspected |
Levelling, damaged boards, cracks, old adhesive and forming shower falls |
|
Waterproofing |
Price the complete named system |
Area, corners, pipe penetrations, niches and drain connection |
|
Adhesive and grout |
Use products approved for the tile and location |
Glass, stone, translucent pieces, many joints and specialist grout |
|
Trims and sealant |
Measure every exposed edge and movement joint |
Niches, curves, metal finish and complicated junctions |
|
Labour |
Agree a written scope or day-rate allowance |
Sheet alignment, individual cuts, backing type, access and cure stages |
How to convert a sheet price to a square-metre price
Use the actual coverage printed on the product page or box.
Price per m² = sheet price ÷ sheet coverage in m²
A 300 x 300 mm sheet covers 0.09 m². In a worked example, a sheet priced at £18.99 equals approximately £211 per m² before waste. This is an arithmetic example, not a quoted Tiles Paradise mosaic product.
For a 2 m² feature area with 10% waste:
-
Add waste: 2 x 1.10 = 2.2 m².
-
Divide by sheet coverage: 2.2 ÷ 0.09 = 24.44 sheets.
-
Round up to complete sheets: 25 sheets.
-
Multiply by price: 25 x £18.99 = £474.75.
Do not mix batches to save a small amount. Colour, piece size and sheen can vary, particularly in glass, stone and intentionally varied ranges.
What is the fitted cost per square metre?
There is no defensible single fitted rate for mosaic bathroom tiles. The wider Tiles Paradise 2026 cost guide places a standard full bathroom retile at about £70 to £160 per m² supplied and fitted, but that range is not mosaic-specific. Mosaic work can exceed it because installation is slower and wet-room preparation may be separate.
A useful quotation separates the tile, waste, delivery, substrate preparation, waterproofing, drain or falls, adhesive, grout, trims, sealant, labour and disposal. Dividing the final project total by the tiled area gives a fitted square-metre figure, but a small niche may still cost more per m² than an open wall because setup and cutting time do not shrink in proportion.
Ask at least three installers to quote from the same scope. Include tile size, sheet backing, pattern, surfaces, dimensions, wet zones, substrate condition, number of corners and niches, access, removal work and desired completion date.
What should you know before ordering from Tiles Paradise?
The information below was checked against the Tiles Paradise website on 15 August 2026.
-
Tiles Paradise states that it holds more than 200 tiles in its own UK warehouse.
-
The website displays a rating of 4.8 stars from more than 1,000 customers.
-
Tiles Paradise is an online retailer and states that it does not have a showroom.
-
The sample-service page states that cut samples are £1.99 and approximately 10 x 10 cm. Online orders are limited to one sample per design, and samples are not returnable.
-
The shipping policy gives a standard estimate of 2 to 7 working days. Next Day, Day Specific and Saturday upgrades may appear at checkout for eligible UK Mainland addresses.
-
Tiles and other heavy orders are delivered on pallets to the nearest safe kerbside point. Someone must be present to accept a pallet delivery.
-
The shipping policy lists free standard pallet delivery for qualifying tile orders of £500 or more, with possible remote-area exclusions.
-
Visible pallet damage should be photographed, recorded with the courier and reported within 2 working days. Optional extended delivery protection can increase that reporting window to 4 working days where purchased.
-
The returns policy allows cancellation of an entire order within 14 days of receipt, subject to its conditions. Tile and SPC returns normally carry a 30% restocking or handling charge, leftover tiles are not accepted after project completion, and the customer arranges insured return transport.
These are store-wide facts, not proof that every bathroom tile is a mosaic or suitable for every wet area. A dedicated mosaic collection was not shown in the live site navigation at the review date, so confirm current mosaic-sheet availability, backing, floor or wall use and wet-area data before placing an order.
Which mosaic patterns work best in a bathroom?
The strongest pattern is one that suits the viewing distance, surface size and number of interruptions. A busy pattern on a small, broken-up wall can lose its rhythm. A simple repeated field can make the same wall feel intentional.
|
Pattern or shape |
Best use |
Design effect |
Installation note |
|
Penny round |
Shower floors, niches, curved details |
Soft, tactile and slightly retro |
Joint consistency and sheet-seam correction are critical |
|
Hexagon |
Wet-room floors, feature walls, splashbacks |
Geometric and adaptable from classic to modern |
Check cut balance at walls and drains |
|
Square grid |
Shower floors and modern walls |
Calm, architectural and easy to coordinate |
Any uneven sheet seam becomes obvious |
|
Herringbone |
Basin splashbacks and feature panels |
Directional movement and crafted detail |
More perimeter cuts and waste than a straight grid |
|
Chevron |
Feature walls |
Crisp, continuous zigzag |
Points must align accurately between sheets |
|
Basketweave |
Traditional floors and splashbacks |
Period character |
Dry layout before fixing to balance borders |
|
Fan or scallop |
Feature walls and bath panels |
Decorative, soft and contemporary |
Plan the top and side termination before fixing |
|
Kit kat or finger mosaic |
Vertical shower features and splashbacks |
Linear height or width emphasis |
Keep long joint lines straight and clean |
|
Moroccan or star motif |
Feature zones |
High character and colour |
Give the pattern enough uninterrupted area |
|
Pixel blend |
Shower walls and custom gradients |
Depth, movement and bespoke colour |
Open several sheets and blend before fixing |
Best patterns for a bathroom backsplash
Herringbone, small hexagon, finger mosaic, fan and a simple stacked grid work well behind a basin. The practical choice depends on taps, mirror width and sockets. Centre the pattern on the basin or mirror, keep narrow fragments away from the most visible edges and choose a grout colour that either preserves the geometry or softens it.
Best patterns for a wet room
Small squares, hexagons and penny rounds can follow falls more easily than a large rigid tile. Shape alone does not prove slip resistance. Use a floor-rated product with appropriate wet-use evidence and agree the drain, falls, perimeter cuts and sheet direction before adhesive is mixed.
How to choose mosaics for a small bathroom
Small bathrooms benefit from control, not from a rule that every tile must be tiny or pale.
-
Use one mosaic as a focal surface, such as a shower floor, niche or basin splashback.
-
Repeat one colour from the mosaic in the larger wall or floor tile.
-
Keep the number of unrelated finishes low.
-
Use tonal grout for a calmer field or contrasting grout to emphasise geometry.
-
Continue a well-chosen floor mosaic into a level-access shower only when the whole system is approved for both zones.
-
Place the most complete pattern where it is seen on entry.
-
Order samples and view them upright and flat under daytime and evening lighting.
A dark mosaic can work in a compact room when lighting and the surrounding palette are planned. A pale glossy mosaic can brighten a wall, but glare, water marks and reflections should be judged from a sample.
Colour palettes and fixture matching
Start with fixed items that are costly to change: sanitaryware, vanity, worktop, bath, shower tray and metal finishes. Then choose one dominant neutral, one supporting tone and one accent.
|
Bathroom direction |
Mosaic palette |
Fixture pairing |
Grout approach |
|
Minimalist |
Warm white, soft grey, putty or charcoal in a simple grid |
Brushed nickel, chrome or restrained matt black |
Tonal grout for fewer visual interruptions |
|
Coastal |
Sea-glass blue, muted green, chalk white and sandy stone tones |
Brushed nickel, chrome or warm brass |
Pale grey or warm neutral, subject to staining needs |
|
Modern luxury |
Deep green, burgundy, black, pearl or marble effect |
A controlled brass, bronze or black accent |
Tonal grout, unless geometry is the main feature |
|
Vintage |
Basketweave, small hex, floral or black-and-white geometry |
Chrome, nickel or traditional brass |
Contrast can reinforce the period pattern |
|
Spa-like |
Mineral green, limestone, taupe and soft white |
Brushed or muted metal finishes |
Low-contrast grout and restrained movement |
|
Colour-led |
Cobalt, terracotta, blush or multicolour blend |
Repeat one mosaic tone in towels or cabinetry |
Select grout only after seeing a cured sample board |
Avoid matching every finish exactly. A bathroom usually feels more composed when the mosaic repeats one undertone or shape while the fixtures provide a deliberate contrast.
Current mosaic bathroom tile trends worth using carefully
Useful current directions include saturated colour, handmade-look variation, slim finger mosaics, soft geometric forms, stone-effect porcelain, quiet tonal grout, small areas of iridescence and mixed-scale tiling. Recycled-content glass and lower-impact packaging are also receiving more attention, but environmental claims should be supported by data.
Trends date quickly when several are combined. A durable approach is to use the mosaic on a replaceable or contained feature area and keep the main floor, sanitaryware and waterproofed construction calm. Pattern quality, edge details and workmanship will outlast a fashionable colour name.
Can mosaic bathroom tiles increase property value?
A well-designed, well-installed bathroom can improve buyer appeal, and mosaics can signal care or create a memorable feature. They do not produce a predictable percentage increase in property value. Condition, waterproofing, workmanship, layout, local market, room size and the buyer's taste matter more than the presence of mosaics alone.
Choose a technically suitable product and keep receipts, product data, installation photos and guarantees. Evidence of a sound bathroom is more persuasive than an expensive surface covering a poor substrate.
Which mosaic backing is best?
Backing affects handling and adhesive contact. It is part of the specification, not just packaging.
|
Backing type |
How it works |
Advantages |
Limitations and checks |
|
Mesh-backed |
Small pieces are bonded to a mesh on the rear |
Easy to lift, cut and position as a sheet |
Mesh and glue reduce the bonding area; confirm wet-area and adhesive compatibility |
|
Dot-mounted |
Flexible dots connect neighbouring pieces |
More of each tile back can remain open to adhesive and sheets can flex |
Dots must be stable in the intended environment; rows can move during fitting |
|
Face-mounted paper |
Paper holds the visible faces and is removed after initial setting |
Tile backs remain available for adhesive contact |
The face is hidden while setting; timing and removal technique are product-specific |
|
Face-mounted film |
Clear or opaque film supports the front |
Clear film can allow some alignment checks |
Removal timing varies, and adhesive squeeze-through cannot be judged in the same way as an open face |
|
Loose pieces |
Each piece is placed individually |
Maximum design freedom and easy local adjustment |
Slowest method and dependent on precise spacing and setting-out |
For an immersed, continuously wet or steam environment, obtain written approval for the tile, backing, mounting adhesive and fixing system together. A generic statement that the visible material is waterproof is not enough.
What tools and materials are needed to fit mosaic bathroom tiles?
The exact kit changes with the material and substrate. Do not choose a cutter, blade, adhesive or grout until the product instructions are known.
|
Task |
Typical tool or material |
Selection point |
|
Measuring and layout |
Tape, laser or level, square, pencil, straightedge |
Plan full sheets and balanced cuts before mixing adhesive |
|
Surface checking |
Long level or straightedge, moisture checks where specified |
Mosaics reveal small waves and depressions |
|
Preparation |
Scraper, vacuum, approved primer, levelling or repair compound |
Use products compatible with the substrate and tanking system |
|
Waterproofing |
Primer, membrane or tanking kit, reinforcing tape and collars |
Keep components within one approved system where required |
|
Adhesive application |
Clean bucket, low-speed mixer, margin trowel, correctly sized notched trowel |
Trowel size and adhesive type depend on tile, backing and background |
|
Setting sheets |
Grout float or beating block, spacers or wedges, straightedge |
Apply even pressure without forcing adhesive into the joint depth |
|
Cutting |
Mosaic nippers, score-and-snap cutter, wet saw or material-specific blade |
Glass, porcelain, stone and shell need different cutting methods |
|
Grouting |
Grout float, clean sponges, wash buckets, microfibre cloth |
Grout must suit joint width, tile sensitivity and service condition |
|
Movement details |
Compatible sanitary sealant, backing rod where specified, profiling tool |
Use the system's movement-joint detail rather than rigid grout |
|
Safety and protection |
Eye protection, gloves, hearing protection, suitable respiratory protection and dust control |
Cutting can release sharp fragments and respirable dust |
Dry cutting silica-containing tile or stone can create hazardous dust. Use the safest suitable cutting method, extraction and protective equipment, or have specialist cuts made by a professional.
How to prepare bathroom walls and floors for mosaic tiles
A mosaic surface mirrors the substrate. Small tiles do not bridge hollows, hide ridges or strengthen a weak wall.
-
Identify the background. Confirm whether it is tile backer board, render, screed, concrete, plaster or another approved substrate.
-
Check stability and load. Repair movement, delamination, cracks and water damage before decorative work begins.
-
Check flatness. Correct high spots and hollows with products intended for the substrate. Do not use adhesive as an improvised levelling compound unless its maker allows it.
-
Remove contamination. Dust, soap, grease, old sealant, loose paint and powdery surface residue can prevent bonding.
-
Form falls before tiling. A shower floor must drain at substrate level. Trying to create the entire fall in a thin adhesive bed invites uneven support.
-
Prime where specified. Primer choice depends on porosity, system and background.
-
Tank the wet area. Seal corners, joints, penetrations and the drain connection as required by the approved system.
-
Protect the membrane. Do not puncture or contaminate it during setting-out and fixing.
-
Mark guide lines. Plan where full sheets, cuts, trims and pattern centres will land.
If the substrate is uncertain, stop before waterproofing. A sample tile can confirm colour, but it cannot prove that an unknown wall or floor is structurally suitable.
How to install mosaic bathroom tiles yourself
DIY fitting is realistic for a small dry splashback on a sound, flat background. A shower floor, wet room, steam enclosure, complex curve or failed existing surface carries more risk and is usually better handled by a competent professional.

Step 1: Confirm the full specification
Read the tile, adhesive, grout, tanking and substrate instructions. Confirm wall or floor use, wet-area approval, sheet backing, joint width, movement requirements, cure time, sealer and cleaner restrictions. Resolve conflicts before work starts.
Step 2: Measure and calculate complete sheets
Measure each rectangle separately, subtract openings only when they are substantial, add the areas and apply an appropriate waste allowance. Use 10% for a simple layout as a starting point. Allow 15% or more for diagonals, curves, complex niches, fragile stone, intricate matching or uncertain batch availability.
Step 3: Open and blend the order
Check product name, shade, batch, size consistency, damage and sheet alignment. Dry-lay sheets from several boxes so natural or intentional colour variation is spread evenly. Report a material concern before fixing, because installation normally counts as acceptance of appearance.
Step 4: Prepare and waterproof the background
Make the surface sound, clean, dry enough for the chosen system, flat and correctly formed to falls. Install the complete waterproofing system in wet zones, including corners, penetrations and the drain detail. Allow each layer to cure as instructed.
Step 5: Dry-set the pattern
Mark horizontal and vertical guide lines. Place dry sheets to expose narrow edge cuts, sheet seams and awkward clashes with taps, niches, drains and trims. Adjust the centre line or border before adhesive is applied.
Step 6: Mix and apply the correct adhesive
Mix only the amount that can be used within its working time. Spread a controlled area with the recommended trowel, keep the bed consistent and prevent skinning. Translucent or pale glass commonly needs a compatible white adhesive. The installation instructions determine whether ridges should be flattened to prevent show-through and ensure support.
Step 7: Set each sheet without showing the grid
Place the sheet on the guide lines and press evenly with a clean float or beating block. Match the joint between sheets to the joints within each sheet. Step back frequently and correct waves, rotated pieces and visible squares before the adhesive firms. Lift an occasional sheet at the beginning to check coverage, particularly in wet areas.
Step 8: Make safe, supported cuts
Choose a cutting method for the exact material. Support small pieces, protect eyes and hands, control dust and smooth exposed sharp edges where the product permits. Remove individual pieces from a sheet when that produces a cleaner cut around a pipe or drain.
Step 9: Remove face mounting at the specified time
For face-mounted mosaics, follow the maker's timing and wetting instructions. Removing paper or film too early can move the pieces; leaving it too late can make correction difficult.
Step 10: Clean joints and let the adhesive cure
Remove excess adhesive from the joint depth while it is workable without disturbing the tiles. Adhesive left high in the joints can show through grout or cause colour variation. Respect the stated cure time before grouting.
Step 11: Grout small mosaics methodically
Test grout on a spare sheet, especially with porous stone, textured surfaces, metal, shell or delicate coatings. Work diagonally across the joints with a suitable float, fill them fully and clean in controlled stages. Too much water during washing can weaken or discolour cement grout. Epoxy grout requires its own timing and cleaning method.
Step 12: Complete movement and edge details
Use the specified flexible sealant at changes of plane, perimeters and movement locations. Fit compatible profiles where edges remain exposed. Do not rigidly bridge a designed movement joint with tile or grout.
Step 13: Seal only where required
Apply an impregnating sealer to stone or grout only when the tile or grout maker calls for it. A sealer can reduce staining but does not waterproof the construction. Test it for colour change and residue.
Step 14: Protect and cure the installation
Keep traffic, dust, cleaning chemicals and water away for the full system cure. Do not use a shower merely because the grout surface looks dry. UK trade guidance commonly gives at least 14 days before a newly tiled conventional shower is used, while proprietary systems may state different periods. Follow every relevant instruction and use the longer applicable cure time where requirements differ.
What are the best grouting techniques for small mosaics?
Small mosaics contain far more joint length per square metre than large tiles, so grout colour, consistency and cleaning have a stronger visual effect.
-
Make a sample board with the actual tile, adhesive and grout.
-
Confirm that the grout covers the smallest and largest joint present.
-
Keep adhesive out of the grout depth.
-
Mix each batch with the same water ratio and method.
-
Pack joints from more than one direction, then strike off diagonally.
-
Wash with the minimum water required and change dirty water frequently.
-
Do not overwork partly cured joints.
-
Use a compatible release agent or pre-sealer if the tile maker recommends it.
-
Treat changes of plane and specified movement joints with the approved flexible detail.
-
Protect fresh grout from water, heat and forced drying.
White grout exposes dirt and shade variation quickly. Very dark grout can mark a porous or pale tile and may show mineral residue. A mid-tone grout often balances maintenance and pattern definition, but only a cured sample reveals the real result.
Common mosaic tile installation mistakes
-
Choosing by appearance before checking location approval. A wall-only glass mosaic is not made safe by extra grout joints.
-
Assuming tile and grout are waterproof. This leaves the substrate and penetrations vulnerable.
-
Ignoring sheet backing. An incompatible mesh adhesive or limited contact area can weaken the installation.
-
Tiling an uneven substrate. Mosaics reproduce every dip and ridge.
-
Treating sheet edges as the layout grid. The eye follows the joints between small pieces, so sheets must be adjusted to hide their boundaries.
-
Using a dark adhesive behind translucent glass. Ridges and colour can show through the face.
-
Applying too much adhesive. It fills grout joints and makes consistent grouting difficult.
-
Using excess water to clean grout. This can cause weak, patchy or pale joints.
-
Grouting movement locations rigidly. Corners and perimeters need their designed flexible treatment.
-
Skipping a sample board. Grout and sealer can change the appearance of stone, shell and textured tile.
-
Ordering by sheet count without checking coverage. Nominal sheet sizes do not always equal usable coverage.
-
Starting the shower too soon. Surface dryness does not mean the full build-up has cured.
Can mosaic tiles be laid over existing bathroom tiles?
Sometimes. The existing tiles must be firmly bonded, stable, clean, free of soap and grease, sufficiently flat and able to carry the added weight. Hollow or loose areas, cracked backgrounds and water damage must be investigated rather than covered. The old surface may need abrasion or an approved primer, followed by a compatible adhesive.
Over-tiling changes finished levels around doors, drains, taps, trims and sanitaryware. It can also conceal the condition of the old waterproofing. Do not over-tile a leaking shower or a floor with unexplained movement.
Can mosaics be installed on a curved shower wall?
Small pieces on a flexible sheet can follow a gentle, uniform curve better than a large tile. The sheet still has a minimum practical radius. Dry-wrap it around the prepared curve, check whether joints open or close unevenly, and remove or reposition individual pieces where needed. The background, waterproofing and adhesive must be suitable for the curve and wet exposure.
Tight radii, compound curves and custom patterns require specialist planning. Do not force a sheet flat against a radius if that leaves pieces unsupported or distorts the joint field.
Are mosaics compatible with underfloor heating?
Many porcelain, ceramic and approved stone mosaics can be used over a correctly designed underfloor-heating system. Compatibility applies to the complete assembly, not the tile alone.
-
Confirm tile and backing approval in writing.
-
Have electrical work designed and connected by a competent person.
-
Encapsulate the heating system as specified and create a flat receiving surface.
-
Use compatible primer, membrane where required, flexible adhesive and grout.
-
Provide perimeter and movement joints to the project design.
-
Keep the heating off and the substrate cool during installation and cure.
-
Commission the system gradually after the full stated waiting period.
Never switch heating on to accelerate curing. Sudden thermal movement can damage a young installation.
Are mosaic tiles suitable for a steam shower?
Only when the exact tile, backing and complete construction system are approved for steam exposure. A steam enclosure places greater vapour and temperature demands on the assembly than an ordinary shower. It needs a designed vapour-management and waterproofing approach, compatible drain and penetrations, suitable setting materials, movement accommodation and controlled curing.
Use a specialist designer or installer and obtain written system compatibility. Pearl shell, natural stone, coated glass, metal accents and some backings may carry restrictions.
What trims and edging work with bathroom mosaics?
Choose the edge before tiling starts.
-
Metal profiles give a straight, durable edge and can coordinate with taps or shower hardware.
-
Colour-matched profiles reduce contrast in a minimalist design.
-
Stone or porcelain pencil trims can frame traditional panels when their dimensions align.
-
Mitred edges create a quiet finish but require adequate tile thickness, accurate cutting and safe edge treatment.
-
Return tiling carries the mosaic around a corner and avoids a separate trim where the layout allows it.
-
Flexible profiles may be needed for certain curves.
Match profile depth to the combined tile and adhesive build-up. Check chemical resistance in showers and do not leave sharp glass, shell or metal edges exposed.
How to clean and maintain mosaic bathroom tiles
The safest routine is simple: remove water, use a pH-neutral cleaner approved for the tile and grout, agitate with a soft tool, rinse and dry. The material determines what must be avoided.

After each shower
-
Squeegee glass and smooth tile faces.
-
Remove standing water from shelves and corners.
-
Run extraction long enough to reduce lingering humidity.
-
Leave the enclosure open when practical so surfaces dry.
Weekly cleaning
-
Vacuum or rinse away loose grit.
-
Apply the approved diluted cleaner.
-
Allow only the stated dwell time.
-
Agitate grout lines with a soft nylon brush.
-
Rinse thoroughly so detergent does not create a slippery film.
-
Dry glass, metal and iridescent surfaces with a soft cloth.
Do not mix cleaning chemicals. In particular, never mix bleach with acids or ammonia. Ventilate the room, wear the protection stated on the label and keep products away from children.
Material-specific care
|
Material |
Preferred routine |
Avoid unless the maker approves it |
|
Porcelain |
Neutral cleaner, soft brush and clean rinse |
Oily products that leave a slip-reducing film |
|
Glazed ceramic |
Mild cleaner and non-scratch cloth |
Abrasive pads and harsh powder on glazed faces |
|
Glass |
Soft cloth, non-abrasive cleaner and drying |
Scouring pads and tools that scratch coatings or edges |
|
Iridescent glass |
Very soft cloth and explicitly approved cleaner |
Acids, alkalis, abrasive pads and prolonged chemical dwell |
|
Natural stone |
Stone-safe pH-neutral cleaner and sealer maintenance where required |
Vinegar, limescale remover and acidic bathroom cleaners |
|
Pearl shell |
Maker-approved gentle cleaner and prompt drying |
Abrasion, strong chemicals and unverified limescale treatment |
How to clean discoloured mosaic grout
First identify whether the change is surface dirt, soap film, mineral deposit, mould, pigment loss or moisture migrating from behind the tile. Cleaning cannot fix a leaking substrate or permanently washed-out grout.
-
Test a pH-neutral grout cleaner in an inconspicuous area.
-
Use a soft nylon brush, not a metal brush.
-
Rinse and dry the area fully.
-
Repeat only within the cleaner's instructions.
-
If staining remains, check whether a compatible specialist cleaner, grout colourant or local regrout is appropriate.
-
Investigate recurring dark patches, crumbling joints, salts or persistent damp.
Avoid acid on natural stone and use caution on cement grout. A stronger chemical is not automatically a better cleaner.
How to remove mould from mosaic tiles and joints
Mould returns when moisture, residue and slow drying remain. Improve extraction, repair leaks, remove standing water and clean soap film before treating the visible growth.
Use a bathroom mould product only if it is approved for the tile, grout, sealant and nearby metal. Follow the label, ventilate and never combine it with another cleaner. Porous natural stone, coloured grout, shell and metal mosaics may be damaged by common bleach-based products, so test first or use a material-specific alternative.
If mould sits within failed silicone, remove and replace the sealant after the joint has been cleaned, treated and dried. Mould that returns behind a tile edge or beside a cracked joint can indicate water ingress and needs investigation.
What is the best sealant for mosaic shower tiles?
"Sealant" can mean two different products.
-
Flexible sanitary sealant is used at specified movement joints, changes of plane and some junctions. Choose one compatible with the tile, grout, waterproofing detail and service condition. Neutral-cure chemistry may be required for certain stone or metal.
-
Impregnating sealer can reduce absorption in porous stone or some cementitious grout. It does not form the primary waterproofing layer and should not be applied to a material that does not need it.
There is no universal best brand or chemistry. The safest choice is the product named or approved by the tile and installation-system manufacturers. Test it on a spare sheet for colour change, sheen and residue.
How to maintain iridescent mosaics
Iridescent finishes can be coatings, layers or textured surfaces rather than solid colour through the glass. Use a soft cloth, an approved non-abrasive cleaner and light pressure. Rinse and dry to reduce water spotting. Keep acidic limescale removers, abrasive powders, steam-cleaning tools and stiff brushes away unless the product instructions expressly allow them.
Inspect exposed edges and joints periodically. If a coating starts to lift or cloud, stop using the current cleaner and ask the supplier for the product-specific care sheet.
How to repair a cracked mosaic bathroom tile
A single cracked mosaic piece can sometimes be replaced without removing a whole sheet.
-
Photograph the fault and keep the batch details.
-
Check whether the crack resulted from impact or continues across several pieces or joints.
-
Protect adjacent faces and carefully remove grout around the damaged piece.
-
Break and lift the damaged piece in small controlled sections without driving a tool into the waterproofing.
-
Remove loose adhesive without damaging the substrate or membrane.
-
Set a matching replacement with compatible adhesive.
-
Allow it to cure, then regrout and reinstate the movement detail where relevant.
Stop and call a professional if cracks recur, follow a line across the installation, sound hollow, accompany dampness or sit above underfloor heating. Those signs may point to substrate movement, poor coverage or waterproofing failure. A cosmetic patch will not correct the cause.
DIY or professional mosaic installation?
|
Project |
DIY may be reasonable when |
Professional fitting is the safer choice when |
|
Small dry splashback |
Substrate is sound, layout is simple and the tile is easy to cut |
There are many sockets, fragile glass, stone sensitivity or complex pattern matching |
|
Shower wall |
Installer understands tanking and the complete system is documented |
Background condition, penetrations, niches or backing compatibility are uncertain |
|
Shower or wet-room floor |
Rarely, for an experienced tiler working to a designed system |
Falls, drain connection, slip risk and waterproofing must be coordinated |
|
Curved wall |
Curve is gentle and a full dry trial succeeds |
Radius is tight, compound or visually critical |
|
Steam shower |
Not recommended as a first DIY wet-area project |
Vapour control and system warranties require specialist work |
|
Repair |
One impact-damaged piece is accessible and the membrane is safe |
Cracks recur, water is present or the substrate sounds hollow |
When comparing installers, ask for recent mosaic and wet-area examples, insurance, training or trade membership, the proposed waterproofing system, substrate-preparation scope, movement-joint plan, cure times and written workmanship guarantee. A low tile-laying rate can exclude the work that determines whether the bathroom lasts.
How to choose a UK mosaic tile supplier
A strong supplier makes product suitability easier to verify. Use this checklist before ordering:
-
Product page states wall or floor suitability and named wet-area limitations.
-
Sheet coverage, individual piece size, thickness, joint width and backing type are clear.
-
Slip claims include a test method and result for the relevant condition.
-
Material, finish and cleaning restrictions are disclosed.
-
Underfloor heating, steam, commercial or outdoor use is confirmed in writing where relevant.
-
Sample size, price and return status are stated.
-
Stock status, batch handling, dispatch estimate, kerbside delivery and damage reporting are clear.
-
Returns, warranty and shade-variation terms can be read before ordering.
-
Adhesive, grout, tanking and sealer recommendations are compatible with the mosaic.
-
Trade or bulk enquiries have a documented route.
-
Customer reviews are recent, attributable and read for service detail, not only the star average.
How to compare mosaic prices online
Create one line per product and record sheet price, actual sheet coverage, price per m², waste, delivery, sample cost, stock, batch, returns, installation products and expected maintenance. A cheap sheet can be expensive per m² if it is small. A premium product can cost less overall if it needs little waste and avoids a complicated border.
Do not rank retailers solely by headline price. Technical answers, consistent stock, damage handling and replacement-sheet availability can be more valuable once a waterproofed room is waiting for completion.
Are tile kits useful for DIY mosaic projects?
A kit can simplify a splashback when it includes the right quantities and every component is compatible. Wet areas should not be assembled from a generic "mosaic kit" without a named substrate, membrane, tape, drain detail, adhesive, grout and sealant system. Calculate coverage and cure times independently, and check whether tools, trims and waste are excluded.
How to assess bespoke, handmade and luxury mosaics
Ask for a physical control sample, material specification, tolerances, mounting method, colour range, lead time, replacement policy, wet-area and floor approval, cleaning restrictions, artwork proof and final layout dimensions. Bespoke colour matching should be approved under the lighting of the finished bathroom. Handmade variation should be agreed as an aesthetic feature, not discovered after installation.
For pearl shell, natural stone, metallic detail or integrated lighting, insist on written location and care guidance. Lighting must be a separate bathroom-rated electrical system with accessible components and competent design. A decorative sheet should not be assumed to contain a serviceable, compliant light source.
Choose by bathroom area before choosing by colour
The best mosaic bathroom tile is the one that suits its exact location. A shower floor needs reliable wet-use evidence and correct drainage. A shower wall needs a compatible backing, adhesive and waterproofed background. A splashback gives more freedom, but it still needs a cleanable finish and tidy edge detail.
Compare every sheet by usable coverage, order enough from one batch and test the tile with the intended grout before fitting. For a wet room, steam shower, curved surface or heated floor, obtain written compatibility for the complete system and use an experienced installer where the risk is beyond your skill level.
Shop and plan the project with Tiles Paradise
When the specification is clear, use these Tiles Paradise resources to compare coordinating tiles, calculate quantities, check fixing products and confirm current mosaic availability.
|
Tasks |
Tiles Paradise resource |
|
Browse the wider bathroom range |
|
|
Compare products intended for floors |
|
|
Start with products grouped for added slip consideration |
|
|
Compare ceramic options |
|
|
Compare porcelain options |
|
|
Order a piece to check colour and texture at home |
|
|
Estimate the base quantity |
|
|
Check compatible fixing products |
|
|
Ask about a larger commercial order |
|
|
Review reduced-price stock |
|
|
Confirm current delivery terms |
|
|
Check returns before ordering |
|
|
Ask a product-specific question |
Tiles Paradise states that it holds more than 200 tiles in its UK warehouse and displays a 4.8-star rating from more than 1,000 customers. The live site did not show a dedicated mosaic collection when this guide was checked, so confirm that a shortlisted item is a true mosaic and approved for the intended bathroom area before ordering.
For related planning, read the UK bathroom tiling cost guide, how to calculate bathroom tile quantities, how to tile bathroom walls and floors, bathroom tile ideas and the narrower guide to porcelain mosaic floor tiles for kitchens and bathrooms.
Frequently asked questions about mosaic bathroom tiles
Where can I find waterproof mosaic bathroom tiles?
Look for a low-porosity mosaic explicitly approved for the intended shower, wall or floor area, but remember that no tile replaces tanking. Tiles Paradise did not show a dedicated mosaic collection at the review date, so contact the team to confirm current availability and the exact fixing-system requirements.
Where can I find mosaic bathroom tiles with anti-slip properties?
The bathroom anti-slip tile collection shows wider floor options, but it should not be treated as a dedicated mosaic range. For any mosaic sheet, request wet-condition evidence for the exact finish. Collection placement or extra grout lines are not substitutes for test data or shower-floor approval.
Where can I buy sample mosaic bathroom tiles?
The Tiles Paradise sample service listed cut samples at £1.99, typically around 10 x 10 cm, with a maximum of one sample per design when reviewed on 15 August 2026. Samples were non-returnable. Check the live terms before ordering.
Does Tiles Paradise have a mosaic bathroom tile showroom?
No. Tiles Paradise states that it is an online retailer with a UK warehouse and no showroom. Use home samples to judge colour, texture and grout pairing, then send product-specific questions through the contact page.
Does Tiles Paradise have a dedicated mosaic bathroom tile collection?
A dedicated mosaic collection was not shown in the live site navigation when this guide was checked on 15 August 2026. The site has a broad bathroom tile collection and mosaic buying guides, but current mosaic-sheet stock should be confirmed through the contact page. Do not assume that a small-format or patterned tile is a mosaic.
Where can I find affordable mosaic bathroom tiles online in the UK?
Compare complete square-metre cost, waste and delivery rather than the sheet headline. The bathroom collection and job lot deals can help with coordinating bathroom tiles, but confirm current mosaic stock before relying on either page for this format.
Does Tiles Paradise offer bulk or wholesale discounts?
Tiles Paradise states that it offers wholesale pricing to trade customers and supplies other tile stores. Submit the requirement through wholesale enquiries, then ask for product availability, batch reservation, pallet quantities, delivery terms and quote validity. No universal discount percentage is published, so do not assume every item or quantity receives the same reduction.
Can I order mosaic bathroom tiles with quick UK delivery?
The current shipping policy estimates standard delivery at 2 to 7 working days. Next Day, Day Specific and Saturday options may be available at checkout for eligible UK Mainland addresses. Tile pallets are delivered kerbside and someone must be present. Confirm a time-critical order before booking a fitter.
Does Tiles Paradise offer mosaic tile fitting, repair or design packages?
The website did not advertise an in-house nationwide fitting, restoration or bespoke bathroom-design package at the review date. Use the contact page for current product support, and appoint an appropriately qualified independent designer or mosaic-experienced tile fixer where the project requires one.
How can I find a local mosaic bathroom tile fitter?
Shortlist installers with recent wet-area mosaic work and check insurance, references, waterproofing competence, written scope and guarantee. A recognised tile-industry directory can help identify candidates, but the contract should name the responsible installer and the system being used.
Which mosaic bathroom tile brands are best?
There is no honest universal winner. Compare exact products on wet-zone approval, slip evidence, absorption, backing, dimensional consistency, batch support, technical documentation, replacement availability, warranty and care. Reviews are useful for identifying recurring service issues, but a brand score cannot make an unsuitable wall mosaic safe for a wet floor.
Can I order custom shapes, sizes or colour-matched mosaics?
Bespoke mosaics are available in the wider UK market, but custom manufacture was not an advertised standard Tiles Paradise service at the review date. Ask for an artwork proof, physical control sample, tolerances, backing, lead time, overage, replacement policy and written wet-area suitability before paying a non-refundable deposit.
Are pearl-shell or natural-stone mosaics suitable for bathrooms?
They can suit selected walls and approved floors, but location approval, sealing, cleaner compatibility and slip evidence are product-specific. No dedicated pearl-shell or natural-stone mosaic range was identified on the reviewed site. Ask Tiles Paradise about current availability rather than relying on general material copy.
Can I buy antibacterial or UV-resistant mosaic bathroom tiles?
Some manufacturers make these claims, but require a named test method, measured result, scope, durability and care conditions. UV resistance matters most near strong sunlight. Antibacterial treatment does not remove the need for ventilation and cleaning. No such feature should be assumed unless the exact Tiles Paradise product page or written technical reply confirms it.
Which mosaics are best for commercial bathrooms?
Start with dense, floor-rated porcelain where appropriate, then specify traffic, wet-slip evidence, cleaning chemicals, joint system, replacement stock and accessibility risk. Submit quantity and specification questions through wholesale enquiries. A domestic suitability statement is not enough for a commercial project.
Do mosaic bathroom tiles come with a warranty or guarantee?
Coverage varies by product and installer. Read the product terms and refund policy, keep batch labels and invoices, and ask what the manufacturer covers before fitting. The current policy says tile returns normally carry a 30% restocking or handling charge and leftover tiles are not accepted after project completion. A product warranty is separate from the installer's workmanship guarantee.
What should I do if tiles arrive damaged?
Inspect the pallet before it is moved or unpacked. Photograph visible damage, note it on the courier paperwork and report it to Tiles Paradise within 2 working days. The shipping policy states that optional extended delivery protection can increase the reporting window to 4 working days where it was added at checkout. Do not install a damaged tile while a claim is being reviewed.
What eco-friendly mosaic choices are available?
Look for durable products with evidenced recycled content, credible environmental documentation, efficient sheet coverage, replaceable stock and right-sized packaging. Ask Tiles Paradise for current product and packaging information because the reviewed site did not publish a universal recycled-content or eco-packaging claim across its bathroom range.
Are DIY mosaic tile kits available?
No standard all-in-one mosaic wet-room kit was identified on the reviewed site. You can build a project list from adhesive, grout and the chosen tile, but every component must be compatible. A shower also needs a specified waterproofing and drainage system.
Where can I compare mosaic bathroom tile prices?
Use a spreadsheet that converts each sheet to price per m² and adds waste, delivery, samples, fixing products and likely maintenance. The tile calculator can help with base quantity, but sheet coverage and pattern waste still need manual confirmation.
Can Tiles Paradise provide a mood board or in-person design consultation?
Free mood boards, in-person consultation and bespoke colour matching were not advertised services at the review date. Order tile samples, photograph them beside fixtures in the room and use the contact page for current product guidance.
Where can I find vintage, geometric, coloured or luxury mosaic designs?
Use the bathroom tile collection to establish the wider colour and material scheme, then ask about current mosaic availability. Confirm that the shortlisted item is a true mosaic and suitable for the intended area. For a pattern-led brief, compare the repeat at full-sheet scale rather than judging one small piece.
Can mosaics include integrated LED lighting?
Integrated-light mosaics are a specialist construction rather than a normal tile feature. No such standard range was identified on the reviewed site. A safer design usually separates the tile finish from bathroom-rated lighting installed by a competent electrician, with drivers and service points kept accessible.