





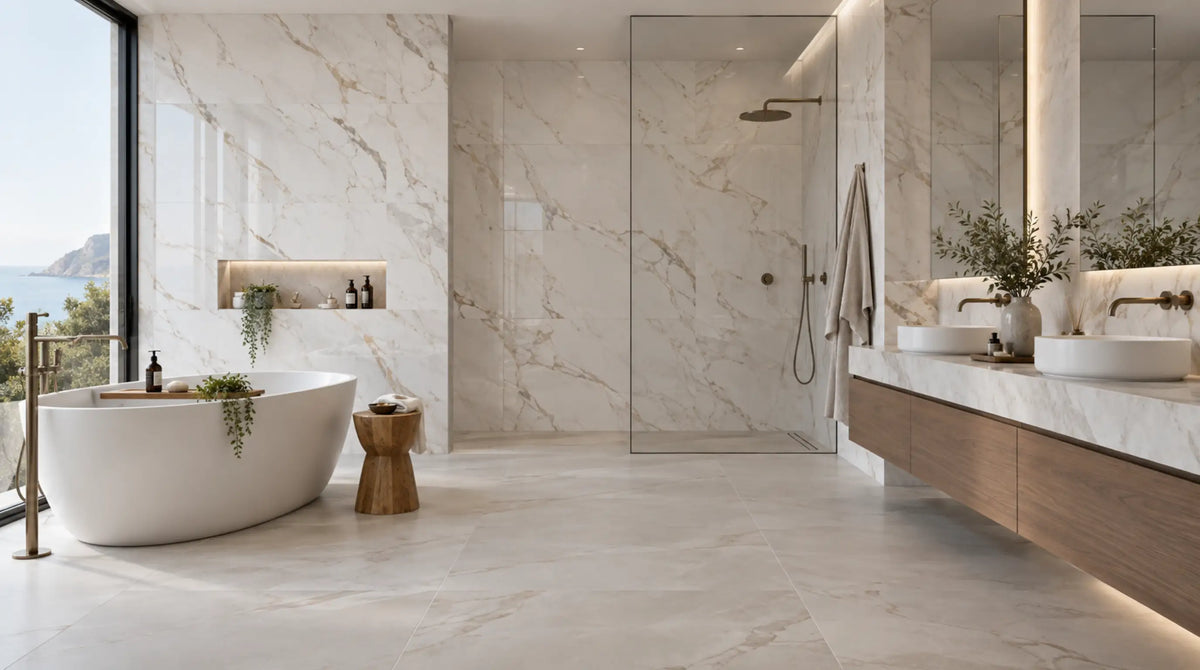
Bathroom tile design is the set of decisions that turn a tile you like into a room that works. What size the tile is. What finish it has. How the tiles are arranged. How wide the gaps between them sit. Colour is the decision most people start with, and it is rarely the one that decides whether the finished bathroom looks right.
Two bathrooms can use the same tile and look nothing alike. One uses a 30x60cm tile on the walls with thin white joints, laid in a brick pattern. The other uses 60x120cm stacked square with wider grey joints. Same product, same colour, completely different room.
That difference is what this guide is about. If you want to browse arrangements and schemes first, the bathroom tile ideas guide covers those. This one is the decision side.
Start with the room, not the tile
Four things about your bathroom decide most of what follows.
The floor area and the longest wall. A 1.7m bath against a 2.2m wall is a different problem from a 4m x 3m family bathroom. The longest unbroken run is what sets your practical maximum tile size, because that run is where cut tiles become visible.
The light. North-facing, no window, one ceiling fitting. That describes a lot of British bathrooms, and it pushes you towards reflective finishes and lighter tones whether or not you wanted them.
The wet zones. A shower floor, the area round a tray and a wet room floor need something different from the rest of the room. Different finish, sometimes a different size, usually a different grout.
What's underneath. The wall behind the plasterboard and the floor under your feet decide whether large tiles are even possible. A timber floor that flexes and a wall that's out by 8mm will both defeat a 120cm tile.
Everything below follows from those four.
What size tiles should you use in a bathroom?
Size is the first decision because it constrains everything else. It sets how many grout lines the room has, how much cutting your tiler does, how flat the walls and floor need to be, and how large or small the room feels.

What 30x60, 60x60, 60x120 and 90x90 actually mean in a bathroom
These four cover most UK bathroom projects, and each behaves differently.
30x60cm is the standard British bathroom wall tile. It cuts easily, it follows a slightly uneven wall without showing it, and it suits older houses where the walls aren't quite true. Laid in a brick pattern it reads traditional. Stacked vertically it lifts the ceiling. Its weakness is the number of joints — on a full-height wall you get a lot of them, and every one is a line to clean. Browse 30x60cm bathroom tiles.
60x60cm is the default bathroom floor. Big enough to keep joints sparse, small enough to cut round a WC and a basin without wasting half a box, and forgiving on a floor that isn't perfectly level. For a bathroom under about 6m² this is usually the right floor answer. See 60x60cm bathroom tiles.
60x120cm is the large format that now dominates the market. Far fewer joints, and on a marble-effect or onyx-effect tile the veining finally gets enough space to look like stone rather than a repeating print. It works on walls and floors both. What it demands is a flat surface and a tiler who knows what they're doing, because a 120cm tile can't follow a wall — the wall has to come to the tile. See 60x120cm bathroom tiles.
90x90cm and up belong in bigger bathrooms and open wet rooms. Put a 90cm tile in a small room and you get cuts on three sides, at which point the size stops being visible at all and you've paid for nothing. See 90x90cm bathroom tiles.
| Size | Usual place | Grout lines | Needs a flat surface? | Suits |
|---|---|---|---|---|
| 30x60cm | Walls | Many | Not especially | Older houses, uneven walls, traditional looks |
| 60x60cm | Floors, some walls | Some | Reasonably | Bathrooms under 6m², rooms with several fittings |
| 60x120cm | Walls and floors | Few | Yes | Flat surfaces, marble and onyx effects |
| 90x90cm+ | Floors, large wet rooms | Fewest | Yes | Bathrooms over about 8m² |
| Mosaic | Shower floors, niches, curves | Most | No | Slopes, curves, anywhere a rigid tile can't sit flat |
Do large tiles make a small bathroom look bigger?
Partly. Not quite for the reason people give.
A large tile has fewer grout lines, and grout lines are what your eye uses to measure a surface. Fewer divisions means less information about scale, so the wall reads as more continuous. That effect is real.
What gets missed is that it only holds while the tiles are whole. The moment a large tile needs cutting on two or three sides, you've swapped a regular grid for an irregular one, and an irregular grid draws more attention to the room's size than a regular one ever did. A 60x120cm tile across a 1.8m-wide bathroom gives you one full tile and one 60cm cut. That isn't a continuous surface. That's a stripe.
So: large tiles help a small bathroom when the room's dimensions divide reasonably into the tile, and hurt when they don't. Measure first.
Where large tiles go wrong
Three things account for most of it.
The surface underneath isn't flat enough. A rigid 120cm tile bridges whatever is under it, so any dip or bump shows up as one tile edge standing proud of its neighbour. On a polished tile that catches the light along the whole joint and becomes the first thing anyone sees. Boarding or re-skimming the wall before tiling isn't an optional extra on a large tile job — it's part of the job, and it belongs in the quote.
The pattern is offset too far. Laying a long tile in a half-brick pattern puts each joint at the centre of the tile below, and the centre is where a long tile bows most. Keep the offset to about a third, or stack them square and avoid it entirely. Most large-tile manufacturers say the same thing in their fitting notes.
The floor moves. Timber floors flex. Tiles don't. Without a flexible adhesive and a stiff enough floor underneath, that mismatch turns into cracked tiles or a hollow-sounding floor within a couple of years.
There's more on preparation in the large format bathroom tile guide.
Matt, gloss, polished or satin?
Finish does more visible work than most people expect. It changes how the colour reads, how much light the room gives back, how obvious water marks are, and on floors, how safe the surface is when wet.

Where gloss belongs
Gloss is a shiny glaze, usually on a ceramic wall tile, and it's the reason small British bathrooms have used metro tiles for a century. A shiny surface throws light back into the room instead of soaking it up, which matters when your only light is one ceiling fitting.
Gloss is a wall finish. It also shows up every imperfection in the wall behind it, because anything reflective reveals a surface that isn't flat. Flat wall first, then gloss. Browse gloss tiles.
Where matt belongs
Matt is the floor answer, and in a hard water area it's often the wall answer too.
A matt surface scatters light rather than bouncing it, so limescale, water spots and smears are far less visible. If you're in a hard water area — much of the south and east of England is, and your water company publishes the figure for your postcode — a dark polished tile will show a white film within a week of normal use. The same colour in matt hides it almost completely.
Matt also grips better underfoot when wet than a polished version of the same tile, which is why it's the sensible default for any bathroom floor. See matt tiles, and there's more detail in the matt bathroom tile buying guide.
Polished, and the trade-off it brings
Polished porcelain is where marble-effect and onyx-effect tiles look their best. Polishing is what makes printed veining read as real stone. It's also slippery when wet.
That's a genuine conflict, and the way round it isn't a compromise — it's a split. Polished on the walls and across the dry part of the floor. A matt or anti-slip tile in the same shade inside the shower and across the wet zone. Plenty of ranges come in both a polished and a matt anti-slip version at the same size for exactly this reason, so the colour stays identical while the grip changes where it needs to.
Satin and textured
Satin sits between matt and polished, with a low sheen. On a dark colour it's often better than either — it keeps some of the depth a full polish gives without the reflectivity that makes limescale and uneven tiling obvious.
Textured finishes have a raised pattern that grips better when wet. They belong on shower floors and wet room floors. The textured bathroom tiling guide covers which type works where.
| Finish | Light | Grip when wet | Hides water marks | Best place |
|---|---|---|---|---|
| Gloss | Reflects strongly | Low | Poorly | Walls, splashbacks |
| Polished | Reflects strongly | Low | Poorly | Walls, dry floor areas |
| Satin | Low sheen | Moderate | Reasonably | Walls, dark schemes |
| Matt | Scatters | Good | Well | Floors, showers, hard water areas |
| Textured | Scatters | Best | Well | Shower floors, wet rooms |
Porcelain or ceramic, surface by surface
The difference is density. Porcelain is fired harder from a finer clay, so it soaks up almost no water — half a percent of its own weight or less. Ceramic soaks up considerably more, which makes it softer and easier to chip at the edge.
That one difference decides where each can go. Porcelain works on a bathroom floor, on walls, inside a shower and on a wet room floor. A glazed ceramic tile is a wall tile, and that isn't a fault — it's what the product is for. Putting ceramic wall tiles on a bathroom floor is the most common mistake in UK domestic tiling, and it usually shows up as cracked tiles two or three years later rather than straight away.
Porcelain everywhere is never wrong. Ceramic on the walls is a legitimate way to spend less, as long as the floor stays porcelain. Shop bathroom porcelain tiles, or read the ceramic tile selection guide if you're weighing the two up.
One word worth knowing: rectified. A rectified tile has been cut to size after firing so every piece is dimensionally identical, which lets you use narrower joints and get a more continuous surface. Non-rectified tiles vary slightly and need a wider joint to absorb that. Neither is better in the abstract — they suit different looks and different budgets. The rectified tile guide explains the difference properly.
How the layout changes the room
Same tile, different arrangement, different room.
Stacked square lines every tile up on a straight grid. It suits large tiles, where the point is a continuous surface, and it reads modern.
Brick pattern offsets each row. It's the traditional layout for metro tiles and the default for 30x60cm walls. With a long tile, keep the offset to about a third rather than half.
Vertical stack runs rectangular tiles on end. In a low-ceilinged bathroom this is the cheapest way to buy height, and it costs nothing to ask for.
Herringbone sets rectangular tiles at an angle. It wastes more tile than any other layout and needs a good tiler, but on a floor or a feature wall it does something no other arrangement does. See the herringbone bathroom tile guide.
Where the first tile goes
This is the part that decides whether a finished bathroom looks considered or accidental, and almost nothing written for homeowners covers it.

Tiles are almost never laid starting from a corner. If you start in a corner and work across, all the accumulated error and the whole remainder land in the far corner, and you finish with a sliver — a 15mm strip of tile in the most visible part of the room. Start from the centre instead, and the cuts fall equally at both ends with each one more than half a tile wide.
On a floor that means marking a centre cross, laying tiles out dry to see what the edge cuts would be, and shifting the cross until both edges give a decent cut. On a wall it means a level line one tile height above the lowest point of the floor, a plumb line down the centre, and the same dry run.
Two refinements matter more than the rule itself.
Set out to the wall you actually look at — the one you see from the door, or the one behind the bath — rather than the geometric middle of the room. That's the surface where symmetry registers.
And keep the cuts out of your eyeline. Behind the WC, under the vanity, in the corner nobody looks at. Not down the middle of the shower wall.
Worth discussing with your tiler before they start rather than after. The step-by-step tiling guide covers the rest of the process.
Grout: width, colour and type
Grout is chosen as a colour by nearly everyone and as a product by nearly nobody, which is why it's usually the part of a bathroom that fails first.
How wide should the joints be?
Wider than you think, and there's a reason.
Small and medium tiles need at least 2mm. Anything from roughly 60x60cm upwards needs at least 3mm, and very large panels need more again, going up in proportion to the size.
The joint isn't decoration. It's the gap that lets the tiling expand and contract without the tiles pushing against each other. Grouting a 60x120cm tile at 1.5mm because it looks neater takes that allowance away, and the tiling has nowhere to go.
What colour?
A grout close in tone to the tile hides the grid and gives you a continuous surface. A contrasting grout does the opposite and turns the tiling into a pattern. Both are valid — they're different intentions, not better and worse.
Mid grey is the reliable default on floors because it neither disappears nor discolours visibly. White grout on a bathroom floor is the choice people regret most often. Floor grout picks up dirt, and once you've seen it you can't un-see it.
Which grout and which adhesive?
Two things to specify rather than leave to chance.
For grout, ask for one rated for wet areas with low water absorption. For a shower floor or anywhere with mosaic, an epoxy grout is worth the harder application — it doesn't absorb anything and doesn't stain, which matters most where there's the most grout to clean.
For adhesive, tell your tiler what's underneath. A timber floor flexes and a rigid tile doesn't, so it needs a flexible adhesive. Large tiles need one too. Standard adhesive over a moving floor is how tiles crack. And if you're tiling onto plywood, don't — use a proper tile backer board instead.
The grouting guide covers application.
Slip resistance, and the rating that actually applies
Most tile listings give bathroom floors an R rating — R9, R10, R11. It isn't the right number for a home bathroom, and it's worth knowing why.
That R number comes from a test where someone walks on a ramp in safety boots, on a surface covered in oil. It describes a commercial kitchen or a workshop floor. Useful information, for a commercial kitchen.
Your bathroom is bare feet and soapy water. That's a different test, and there's a separate rating for exactly that situation — a barefoot wet rating, the one used for swimming pool surrounds, changing rooms and shower floors. There's also a separate measurement used across the UK for real slip risk, which gives a wet grip score rather than a ramp angle.
The practical version: when a tile is going on a bathroom floor, ask the retailer whether it's rated for barefoot wet areas, not what its R number is. And take the R number with a pinch of salt either way, because a high R rating doesn't reliably mean good wet grip in bare feet — the two tests measure different things and don't convert into each other.
If it's going in a shower or a wet room, ask for anti-slip specifically. The anti-slip bathroom tile range is filtered for it, and the non-slip bathroom floor tile guide goes into it further.
Designing the wall and floor together
The most common way a bathroom goes wrong is that the wall tile and the floor tile were each chosen well, and chosen separately.
A few things that hold up:
Run the same tile up the wall and across the floor. The most continuous result available, and it works particularly well in small rooms and wet rooms. Change the finish rather than the tile — polished on the wall, matt anti-slip on the floor, same shade.
Let one of them be quiet. If the floor is patterned, keep the walls plain. If the walls carry strong marble veining, don't make the floor compete. Two statement surfaces in a 5m² room cancel each other out.
Match the warmth, not the colour. A warm grey floor under cool grey walls looks like a mistake even when both tiles are lovely on their own. Warm goes with warm.
Decide where the wall tiling stops. Tiles ending at a random height is the detail that makes a bathroom look unfinished. Stop at something — the top of the bath, the underside of the window, the top of the door frame, or a deliberate half-height line with paint above. That last one is also cheaper and easier to change your mind about later. See half-tiled bathroom ideas.

Small bathrooms, en-suites and cloakrooms
A small bathroom isn't a normal bathroom scaled down. The constraints change.
Cuts matter more, because proportionally there are more of them. Light matters more, because there's usually less of it. And the fittings take up a bigger share of the floor, so the tiled area you actually see is smaller than the floor plan suggests.
Pale walls with a darker floor is the arrangement that works most reliably. The walls give light back, the floor grounds the room. Vertical stacking on a rectangular wall tile buys height. And a mid-tone grout rather than white stops the grid turning into a cage.
There's a full treatment in the small bathroom tile guide, including what to do with a windowless one.
A cloakroom is a different calculation entirely. It's tiny, it's dry, and nobody spends time in it — which makes it the one room where a bold patterned floor or a saturated colour is low risk and high reward.
Wet rooms and shower floors
A shower floor slopes in two directions at once, towards a drain or a tray. A 60x60cm tile can't follow that shape. A mosaic can, which is why mosaic is still the standard shower floor answer despite having more grout in it than any other format.
That grout is also what gives a mosaic shower floor its grip. More joints means more edges, and edges are where wet traction comes from. Use an epoxy grout there and most of the cleaning burden that normally comes with mosaic disappears.
For the walls of the enclosure, a porcelain in the same shade as the rest of the room keeps everything continuous while the floor changes format. The mosaic tile guide covers sheet sizes and fitting.
Colour, briefly
Colour is the decision most people start with and the one that matters least to whether the room works — which is not the same as saying it doesn't matter. It decides how the bathroom feels.
The structure that holds up: one dominant tone across the big surfaces, one contrast somewhere small, and one warm material to stop a cool scheme feeling cold. Brass, oak and terrazzo all do that job.
There's a guide for each shade: blue, green, grey, beige, white and black.
How much tile to order
Measure each surface, multiply for square metres, take off the door and window openings, then add extra: 10% for a straight layout, 15% for herringbone or anything diagonal. Round up to whole boxes, because that's how tiles are sold.
The extra isn't only for cutting. Tile colour varies slightly between production batches, so a tile ordered eighteen months later to replace a cracked one won't match. The spare box in your loft is the only guaranteed source of a matching replacement.
The tile calculator does the sums for you, the tile quantity guide shows the working, and how much it costs to tile a bathroom covers labour and the costs that sit outside the tile price.
Mistakes worth avoiding
- Putting glazed ceramic wall tiles on the floor. They crack under foot traffic. Use porcelain.
- Putting a polished tile on a shower floor. Use matt, textured or mosaic in the wet zone.
- White grout on a bathroom floor. It discolours and cleaning won't fully bring it back.
- Starting a wall from the corner. Set out from the centre so both end cuts are decent.
- Large tiles on an unprepared wall. Board or re-skim first, and budget for it.
- A half-brick offset on a tile over 600mm long. Keep it to a third or stack it square.
- Ordering the exact area you measured. Add 10%, and keep what's left over.
- Choosing the tile before measuring the room. Size and layout are decisions the room makes for you.
Browse by size and finish
| Looking for | Collection |
|---|---|
| Wall tiles | Bathroom wall tiles |
| Floor tiles | Bathroom floor tiles |
| Marble effect | Marble effect bathroom tiles |
| Ceramic | Bathroom ceramic tiles |
Samples are free, and ordering one is worth the wait. Tile colour shifts under artificial light, and a shade that looks one way in a showroom looks different under a warm bulb at home.
Frequently asked questions
What is bathroom tile design?
It's the set of decisions that determine how a tiled bathroom looks and performs: tile size, surface finish, layout pattern, joint width and grout colour, and how the wall and floor tiles work together.
What size tiles are best for a bathroom?
For most UK bathrooms, 30x60cm on the walls and 60x60cm on the floor. Large tiles at 60x120cm work well when the surface underneath is flat and the room's dimensions divide sensibly into the tile.
Should bathroom wall and floor tiles match?
They don't have to. The most continuous result comes from the same tile in two finishes — polished on the wall, matt anti-slip on the floor. If they differ, keep one surface plain and match the warmth of the two colours.
Is matt or gloss better for a bathroom?
Gloss on walls, matt on floors. Gloss throws light back, which helps a small or dark room. Matt grips better when wet and hides limescale, which matters in hard water areas.
Are large tiles better for a small bathroom?
Sometimes. Fewer grout lines make a surface look more continuous, but only while the tiles are whole. If the room forces cuts on two or three sides, a smaller tile usually looks better.
What grout colour should I use in a bathroom?
Mid grey is the safest default, especially on floors. Grout matched to the tile hides the grid; contrasting grout shows it off. Avoid white grout on floors.
How wide should the gaps between bathroom tiles be?
At least 2mm for small and medium tiles, and at least 3mm from around 60x60cm upwards. The joint lets the tiling move — closing it up causes problems later.
Can I use ceramic tiles on a bathroom floor?
Glazed ceramic wall tiles aren't suitable for floors. Use porcelain, which absorbs almost no water and handles foot traffic.
What slip rating do bathroom floor tiles need?
Ask whether the tile is rated for barefoot wet areas rather than going by the R number. R ratings are measured in safety boots on an oily surface, which doesn't describe a home bathroom.
Where do you start tiling a bathroom wall?
From a centre line, not a corner. Mark a level line one tile height above the lowest point of the floor and a plumb line down the centre, then dry-lay to check the end cuts are equal and bigger than half a tile.
What tile layout makes a bathroom look bigger?
Vertical stacking on a rectangular wall tile adds height. Large tiles with tone-matched grout reduce visual divisions. Both work better with pale walls and a darker floor.
How much extra tile should I order?
10% for straight layouts, 15% for herringbone or diagonal. Keep the spare — colour varies between batches and a later replacement won't match.
Do bathroom tiles work with underfloor heating?
Porcelain conducts heat well and suits underfloor heating. The adhesive needs to be rated for it and the system should be run and turned off before tiling. The underfloor heating tiling guide covers the order of work.
What is a rectified tile?
A tile cut to size after firing so every piece is identical, which allows narrower joints. Non-rectified tiles vary slightly and need wider joints.
Which tiles suit a wet room floor?
Mosaic, because it follows the slope towards the drain. Use an epoxy grout and ask for a barefoot wet rating.
Where to go from here
The order of decisions matters more than any single one of them. Measure the room. Pick the size that divides into it. Pick the finish that suits each surface. Then the layout, then the grout. Colour can come at any point, because colour doesn't constrain anything else.
When you've got a shortlist, order samples and look at them in the actual room, at night, under the light you'll actually be using.